Well, well… It’s time for another quilt. I want it to be something quick and fun, as well as something I haven’t done before. What could it be?
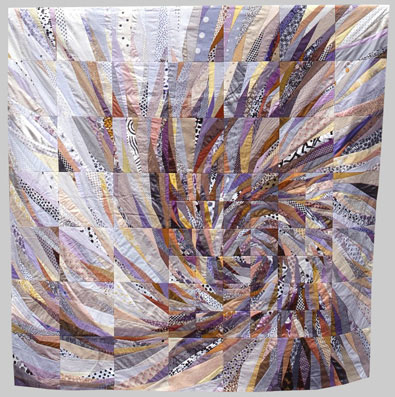
I ran into the quilts by Swiss designer Ursula Kern, and knew I would like to do my own impression of the type of quilts she is making. Here are a few examples of her wonderful work:
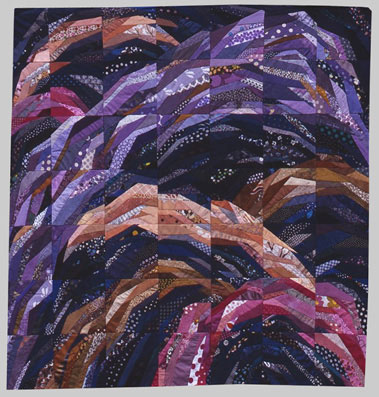
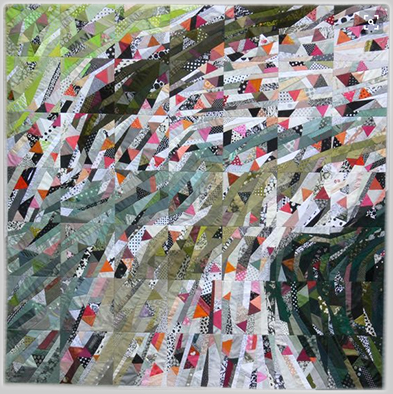
I’m not sure if this kind of quilts has a name, or are they simply considered art quilts or patchworks. An older guy that came over to do some work on the house said that his mom had done over 100 quilts and when I showed him mine, he said it was a crazy quilt. According to Wikipedia, crazy quilt is “a specific kind of patchwork lacking repeating motifs and with the seams and patches heavily embellished”. Crazy quilts are not actually quilts at all, just patchworks without batting, backing and quilting. So my quilt is by definition not a crazy quilt after all. These ridiculous names, eh? It’s just like someone is considered crazy if his thought patterns are lacking the repeating motifs of socially accepted beliefs and ideologies. You can call me crazy, but not my quilt!
As a first step in the design process, I fired up a painting app and began making rough sketches. The goal was to find a compelling movement of lines. I wasn’t concerned with colors or details at this stage, just the overall movement. Here are some of the sketches I saved:
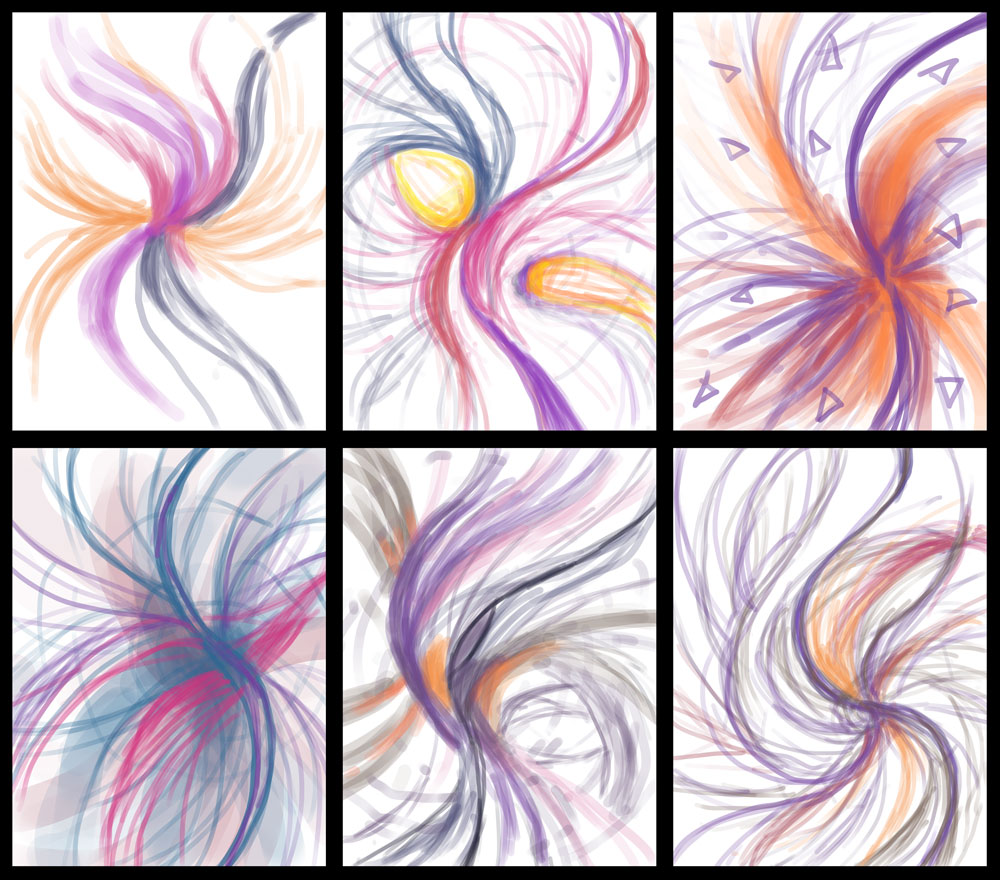
The common theme in all these sketches seems to be one prominent curve that enters and exits the canvas. I called it the narrow path, because of the meaning this term has in different traditions. The bible says, “small is the gate and narrow the road that leads to life, and only a few find it”, while Mahayana Buddhism uses the term to describe a way of life that follows Buddha’s teachings amidst worldly distractions. In my own understanding, it simply means being lucid and observing, instead of identifying as the subject of the thinking process, so that what we are in truth can be revealed. With that angle in mind, I settled for the top middle sketch, because it portrays two very strong focal points, the fiery pits between which the royal purple path moves. These are the metaphorical distractions that bind our attention and identity, whereas staying on the path involves seeing a thought as a thought. And yet, the path seemingly has several dead ends, the forks in the road that only lead to more distractions, but seem like they are about awakening: let’s call those “spiritual egos”.
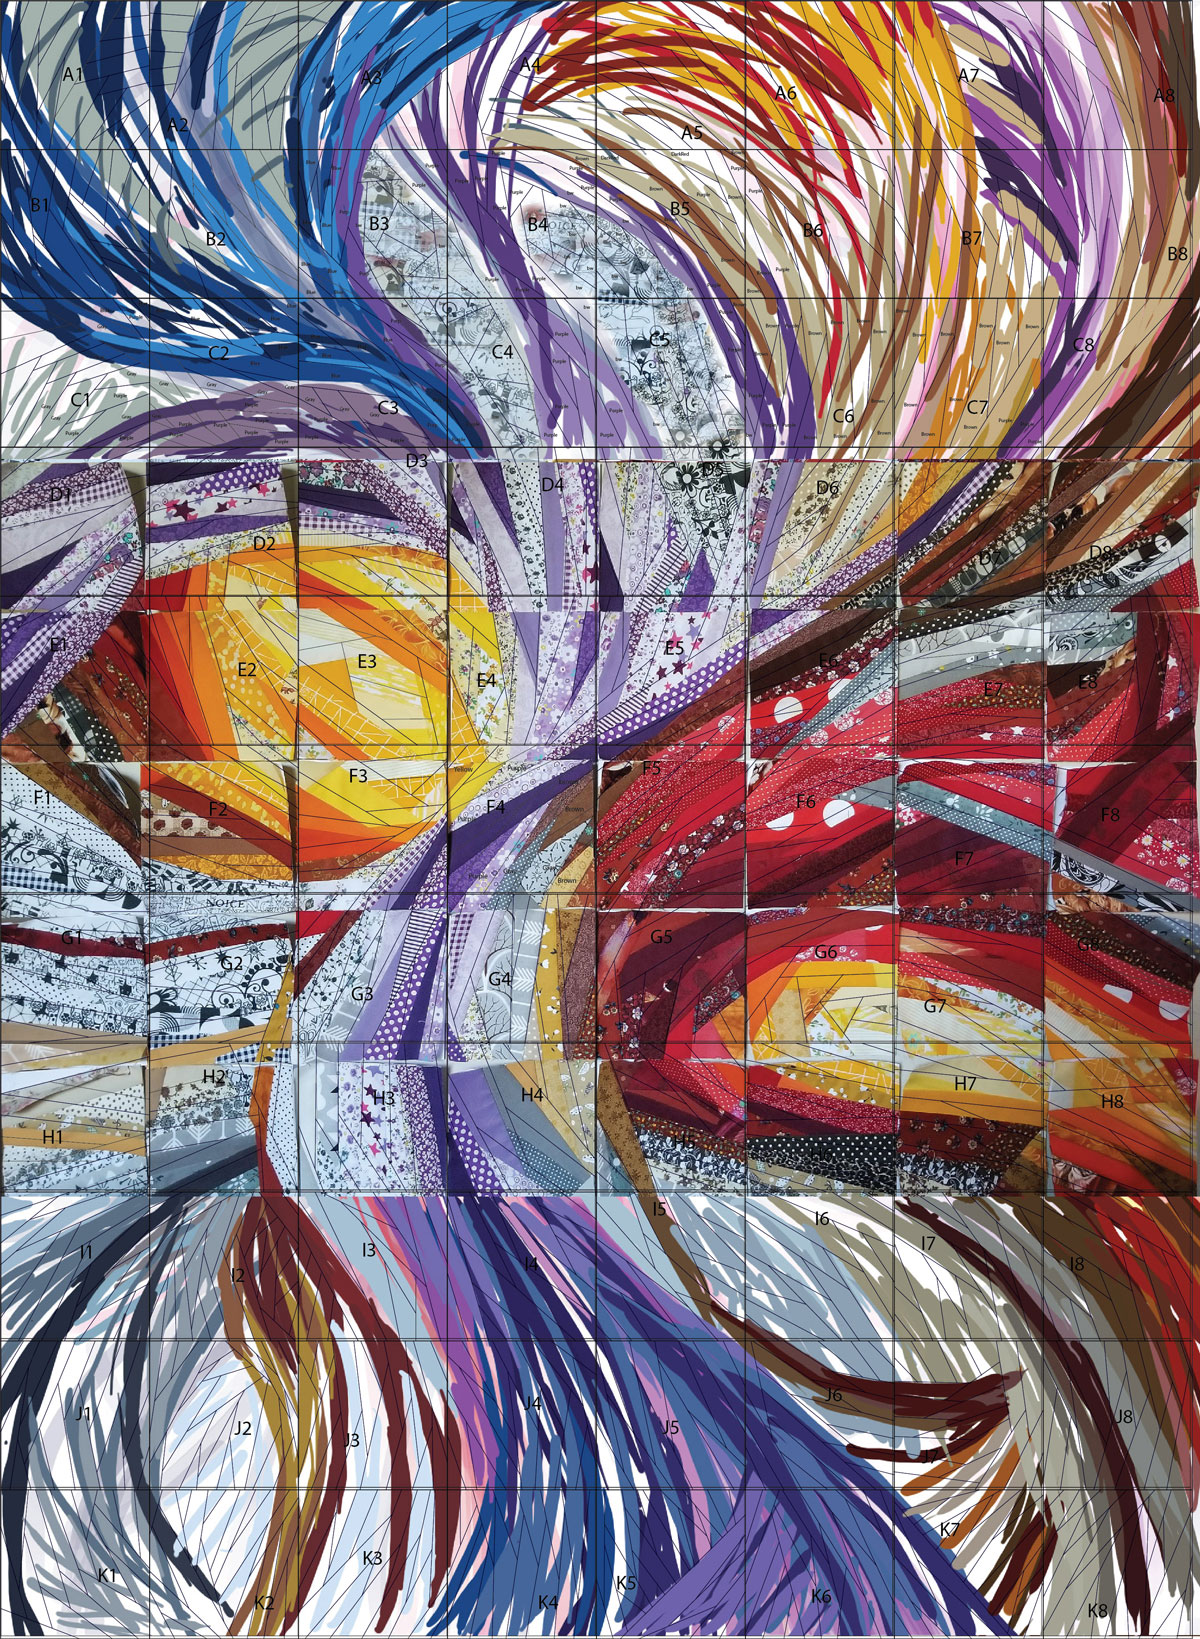
The next step in the design process was to create a grid of blocks in Illustrator. Since I was going to use a piece of crib sized (45″x60″) poly batting that I had laying around, I thought that 8×11 grid of 5″x5″ blocks would work well. That would leave me with 2.5″ border, which seemed appropriate. Once I drew the grid lines, I began dividing each block into sections that matched the sketch. At this point, I was ready (and very eager) to start sewing. I knew up front that this had to be done with foundation paper piecing (FPP), so I picked the middle two blocks to start with, and printed the patterns flipped horizontally on a single letter sized sheet of paper, adding a 1/4″ seam allowance in dashed line around each block. About two millimeters were off the page, but that was okay, since it was only seam allowance on one of the blocks that wasn’t as wide on a printout, and I would be mindful to leave full quarter inch when I do final block trimming, no problem.
Before printing each pair of blocks, I had to make sure the pattern would actually work for FPP method. There has to be an order in which the seams are to be made, meaning that a seam line could not begin or end on a seam that was to be completed first. Usually the FPP blocks are marked with numbers that indicate the order in which the patches of fabric are to be added, however with enough experience with FPP it becomes easy to see where to start and what to do next, so I only marked the first patch in the more complicated blocks.
With 88 blocks and at least 10 patches for each block, it would be extremely tedious and time consuming to print out the template / pattern for each of the patches and cut them to size. I’ve done that on some FPP projects, and it worked well for repeating shapes, but when it comes to all different shapes, it would involve way too much paper and fabric cutting. On the other hand, pre-cutting pieces of fabric that are sufficiently sized often leaves me with a bit of dread: if I make a rectangle patch for triangular shape, I’ll be left with one or likely two wasted triangles, and if I am trying to conserve the fabric, the piece I pre-cut might be just too small, and I’ll have to rip the seam and cut a bigger piece to stitch in, or spend extra time looking at fabric covering the pattern against the light source to make sure the fabric is big enough. These frequent concerns made the FPP not as enjoyable for me, so I had to figure out a way to eliminate them.
Since I was using mostly fabric scraps, fat quarters, charms and 10×10″ pieces, at some point in the process of sewing, it dawned on me that I should just sew in the whole piece of fabric, then trim it after pressing the seam with a roller. And voila! It worked great, and allowed me to have minimal waste of fabric: I would fill up a 3oz plastic ketchup cup with tiny scraps and threads after 2 or 3 blocks – that’s how little waste there was. For this method to work, I had to indent each seam line on the printout by running the tip of the seam ripper against the ruler over each seam line and extend this indent to the edges of a block, which would allow me to easily fold the paper along seam lines. With the paper folded, I would align the fabric to the fold, leaving a quarter inch allowance, and to make sure that there is enough fabric to cover the patch I’m working on, I would be able to see if the corners of this patch on the printout would fall inside the fabric while the paper is folded.
I’ll have to make a video to show how this works, because the written instruction may not make it clear. I haven’t seen this method on YT so it may be worthwhile to share it. I mostly see quilters wasting a lot of time and fabric doing FPP, and even with the new methods they come up with that utilize folded paper and stitching next to the fold (so as to save the printout and be able to reuse it), most still start with pre-cut pieces of fabric often in rectangular shapes much larger than the section to be covered, needing to be trimmed after completing the seams, and thus doubling the amount of cutting and fabric waste as compared to this post-cut method. I would rather save fabric and time than paper. I never order printed patterns: I design and print them myself, and paper is way cheaper than fabric, so I don’t care about sewing onto the paper and having to rip it out and discard it. And if I were to have a pattern printout I would want to save and reuse, I would just make a copy. With this post-cut method, FPP became really fun and really quick all of a sudden. As soon as one seam was done, I would press it, trim the fabric, then start looking for the next fabric, which landed itself really well for this type of patchwork.
Another thing I changed for this method was ditching rotary cutter and embracing scissors for trimming the fabric. Having enough experience now with patchwork, I can easily eyeball quarter inch and make a cut without a ruler. In addition, this switch to scissor trimming allowed me to stop ruining the cutting mat, because it will get ruined by frequently using one small area of it to trim the fabric, and often needing to redo the cut because not everything got cut in the first go around. This also dulls the blade rather quickly, because there are many cuts per each block. I will, however, still use the rotary cutter to trim the finished block, because that’s the only area where the accuracy of seam allowance matters, as those seams are yet to be made.
Enough blah-blah, let’s look at some pictures!
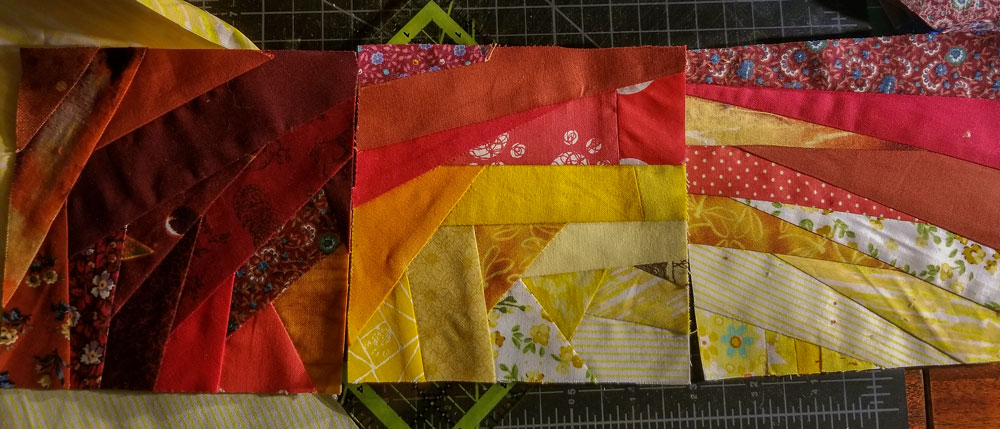
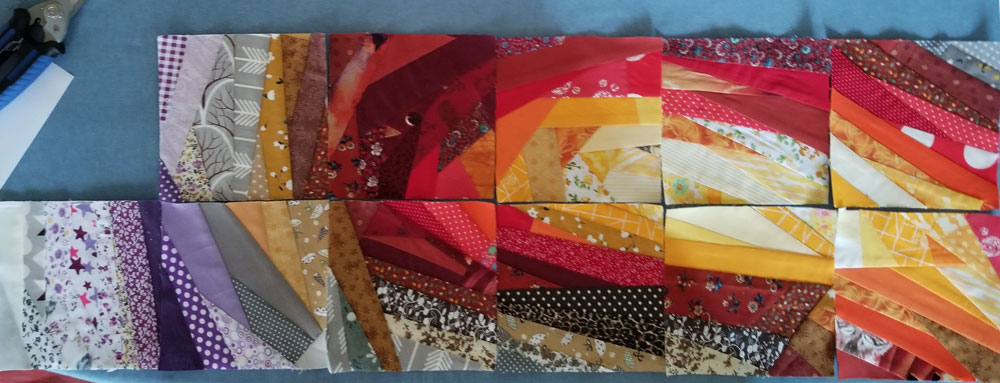
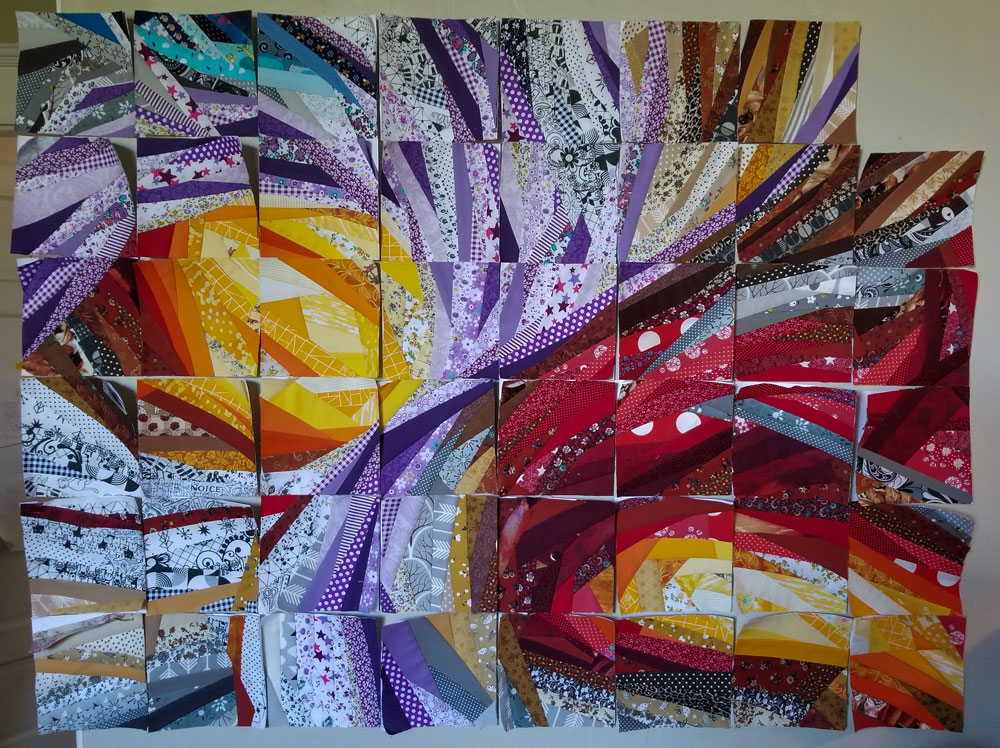
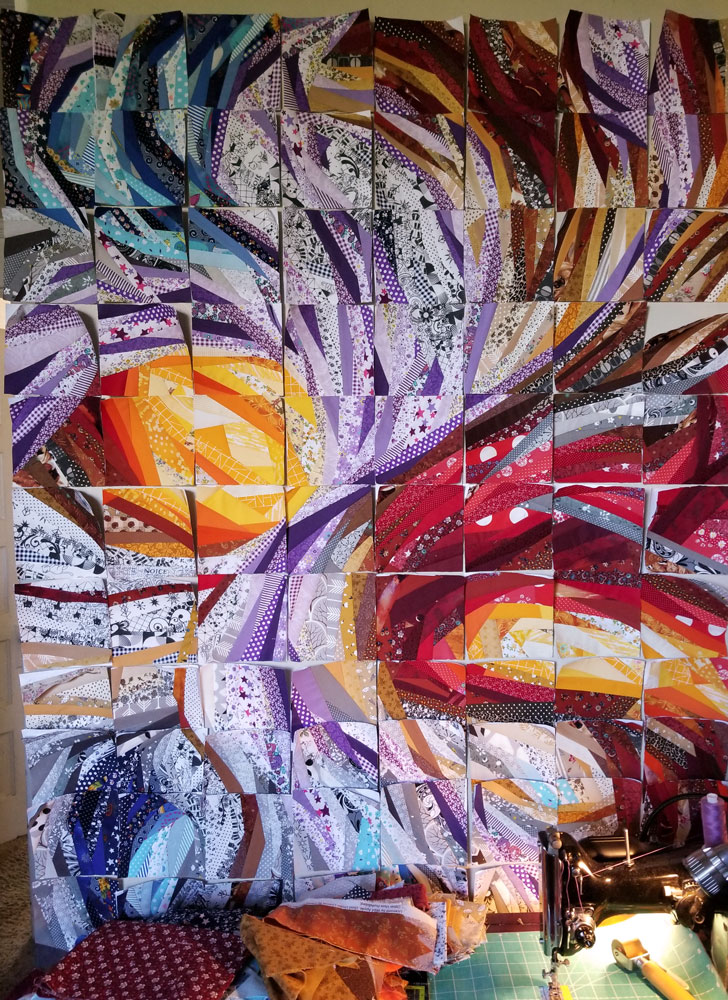
I would select the pieces of fabric to add next as I went along, and since I had, for the most part, no indication printed on a pattern what the color should be, I needed to be able to see previously completed neighboring blocks so that I could pick the fabric that would go well with patches in those blocks. At first I had completed blocks arranged on the extension of my sewing machine, but as the number of blocks grew, I had to figure out a way to have them displayed. The solution was taping them on the wall behind the machine with an outwardly sticky loops of masking tape. In the fourth image, you can see that I took the photo of completed blocks and went back to the drawing board to refine the design, as it was pretty vague and I wanted to give it some more detail so that I could adjust block patterns. I ended up redoing most of the block patterns, since the ones I originally made weren’t all FPP compatible, or they were traced over vague sketch and didn’t make much sense. But with this paint-over, I was able to fine-tune the design of the rest of the blocks that matched what I have already completed. I ended up with much more patches per each block than I originally had drawn out, but that was just fine, because my new post-cut method made it easy and quick to piece.
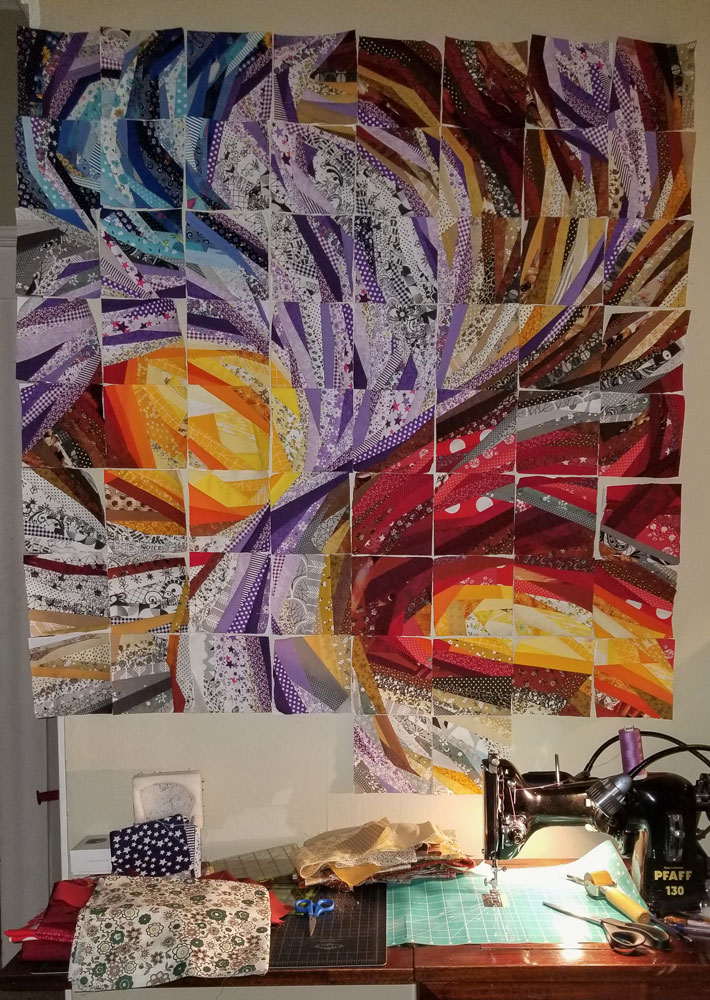
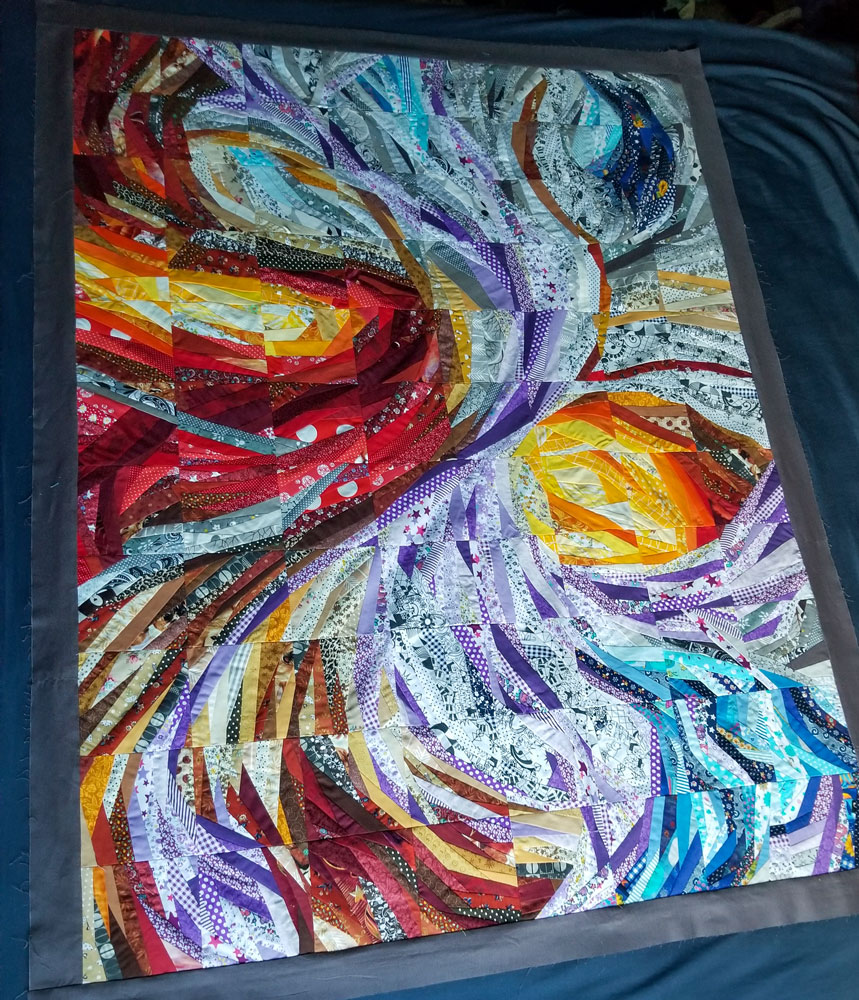
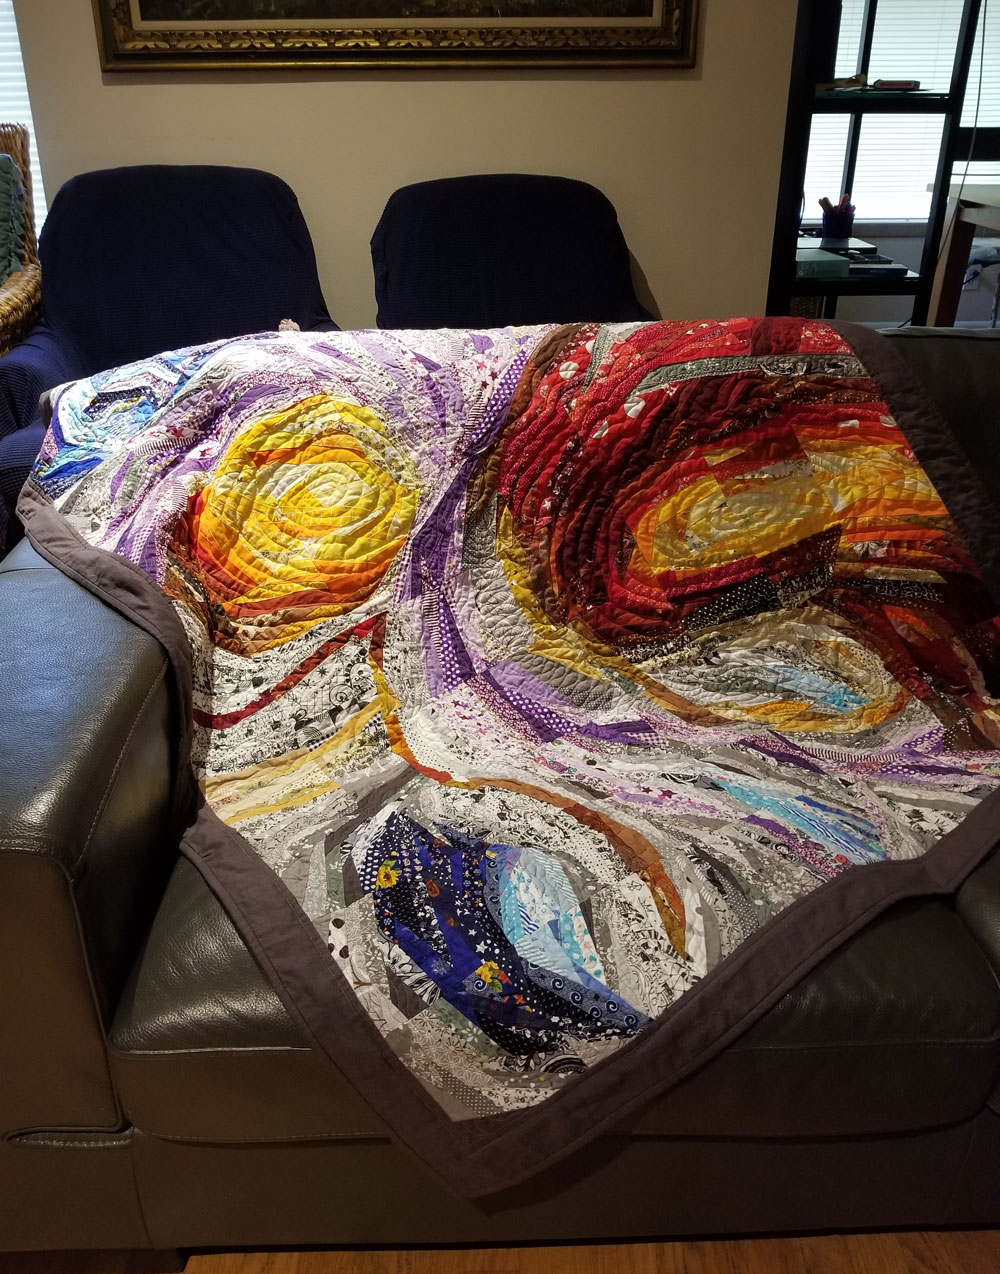
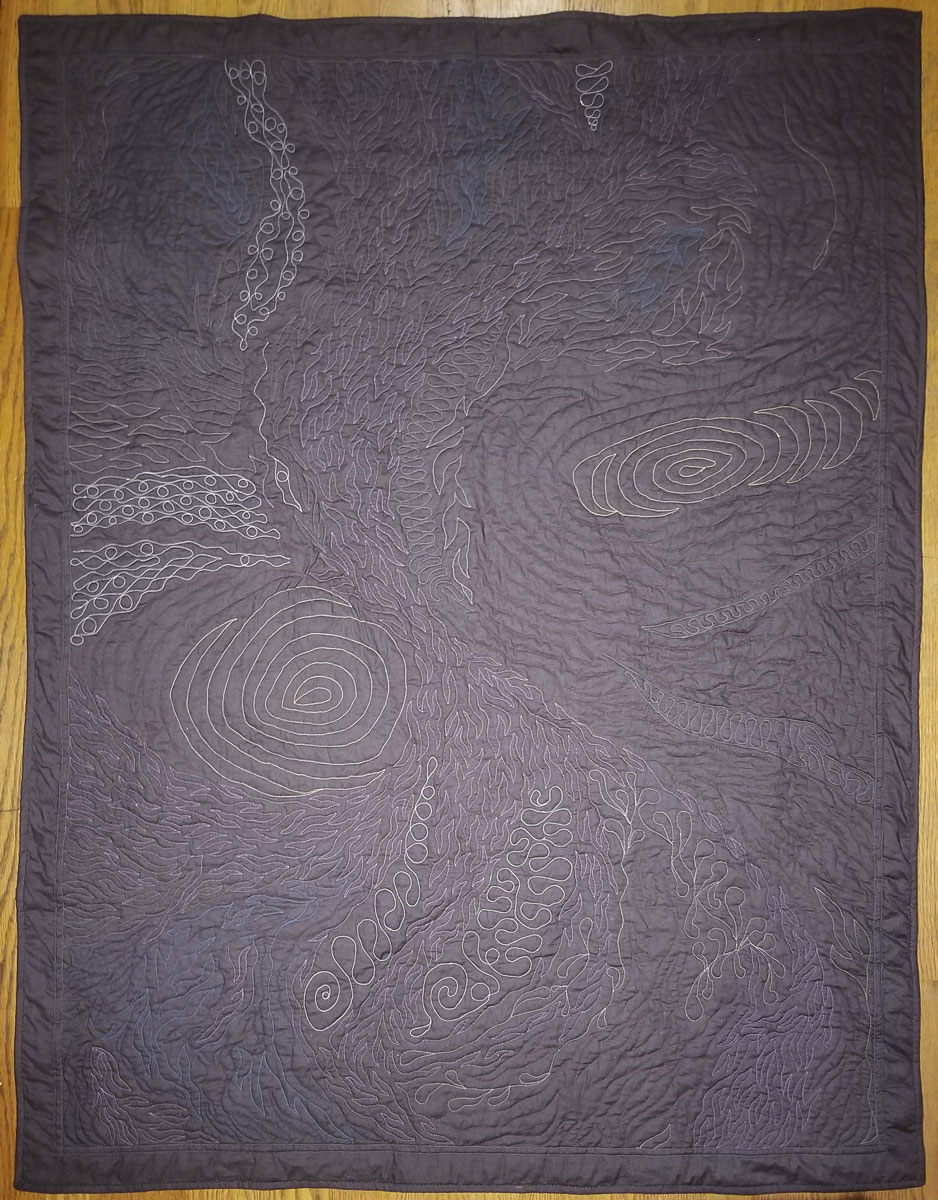
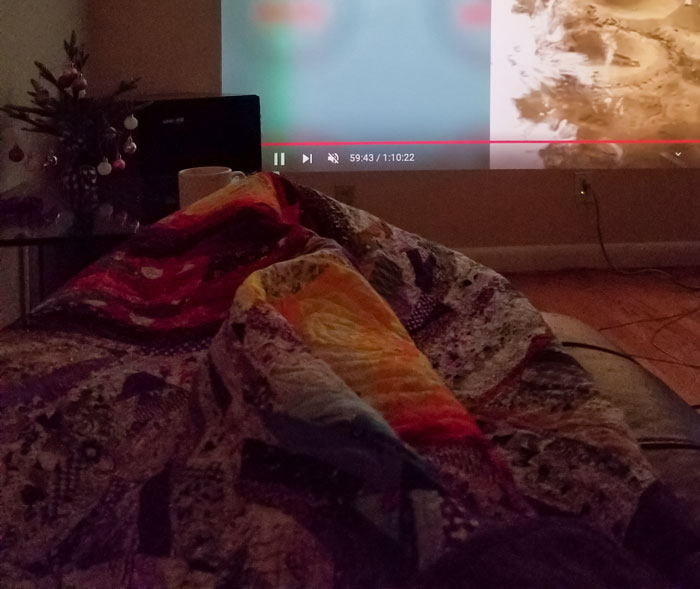
With all the blocks done and ironed, it was time to remove the paper and stitch them all together. In the last image above, you can see the patchwork complete and the 2.5″ border added around it, ready for the quilt sandwich. As usual, I used curved safety pins and no glue. The thing I had to be careful with was the slight stretching of the blocks, because most of the seams were done along the cuts that didn’t match the orientation of the fibers. To take care of this stretching business, I made 5″ marks on the backing fabric and made sure they aligned with each row and column of the blocks as I was inserting the safety pins, so that patchwork would be quilted to exactly 45″x60″ piece of backing fabric. Finally, here’s what the finished quilt looks like on front and back side, and how it’s being used to keep my legs warm while I’m relaxing after dinner in front of a “TV”.