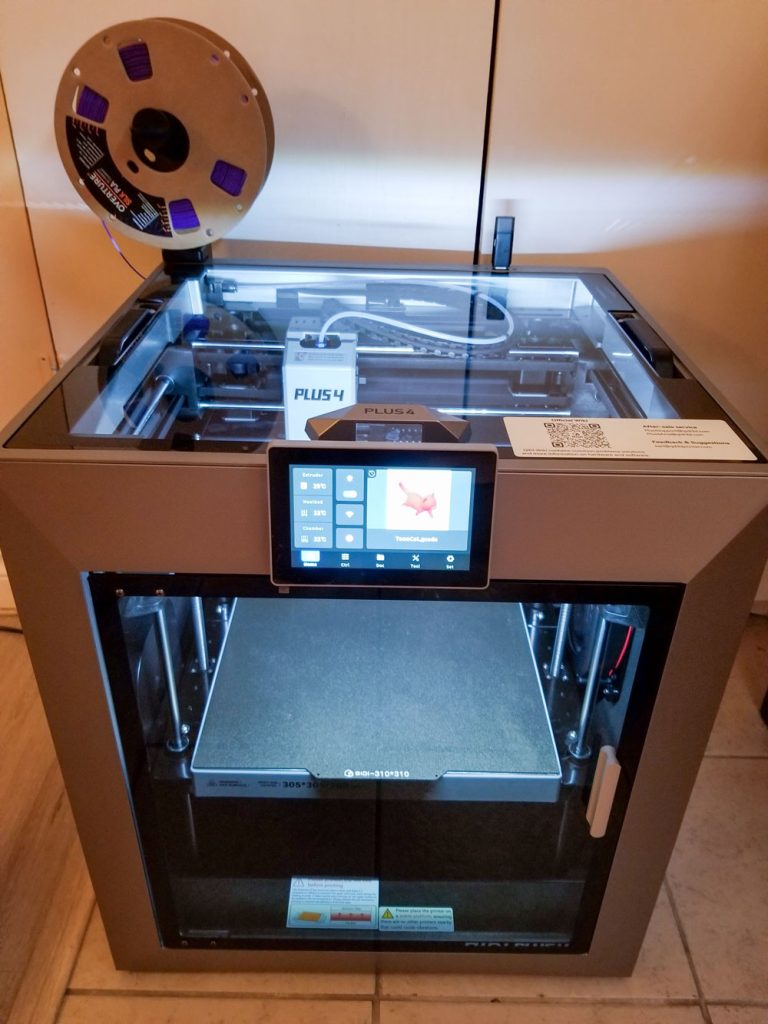
To appreciate my enthusiasm about my new 3D printer, Plus4 from Qidi, let me quickly enumerate drawbacks of my first 3D printer, Creality CR6-SE. First of all, it was an offline printer, never connected to wi-fi or a computer. I had to use SD card to move gcode files from computer to the printer, I could not effectively implement pause at height command (only worked when I gave it a number of seconds to pause for), for filament changes during print I relied on pausing printing manually after waiting for desired layer to begin printing, and I could not print ABS very well due to no enclosure, resulting in warping of the print. In addition, I was experiencing some layer drifting, mainly first couple of layers were misaligned, no matter how the belts were tightened, and some prints didn’t have strong bond, resulting in extruded lines coming off few of the prints, and I had some other issues that have put a pause on a couple of projects I wanted to do. But, this printer has served me well for almost 5 years, so it’s all good. Now I’m enjoying a new chapter in my 3D printing adventures.
I was actually hoping to get Qidi iFast with dual extruder almost two years ago, but we didn’t have room for it, and now that we’ve moved, that’s no longer an issue… unlike the fact that iFast isn’t available anymore. I looked for another options, but ended up coming back to Qidi, because they were about the only company to offer enclosed, heated chamber printers that can handle high temp materials for a very reasonable price ($800). Their latest model, Plus4, has received stellar reviews, so I went ahead and ordered it, along with some spare parts, like extra bimetal nozzles, smooth PEI double sided build plate, filament dryer, and wear items such as hotend protecting silicone sock and PEI wiper sheets. I also got a bunch of Qidi PLA rapido and odorless ABS, since they were on sale for nearly half the price for bulk orders. I thought I would need high speed filaments to be able to get good prints at high speeds, but I was wrong. All of the filaments I tried so far have performed very well at high speeds, some even better than printing at recommended speeds on my old printer. I printed some of the same models that I printed before and made comparisons. For example, the top plate for my soap dishes printed in Silk PLA was shedding some extruded lines around the holes on top layer, but the new print that uses the same filament but printed in about quarter of the time, feels much more solid and strong, and no extruded lines are coming off.
As is usually the case, the first thing printed on a new printer is presliced model loaded either on the SD card / thumb drive or, in my case, right on the printer’s internal memory, with a provided filament. While my CR6-SE came with a full 1kg spool of white PLA, Plus 4 came with only a few meters of black PLA, so that’s what I used to print the Benchy, the little boat, that’s often used for testing, as it provides a good overview of how various angles of overhang are handled. I’m not sure where the print went, I gave it to the kids, but the next model I printed was the one I already had and which had failed during use, namely poop emoji cookie cutter. I got the model from Thingiverse and after using the print on one batch of cookies, I threw it away because the mouth, which was very thin, started breaking off, so I decided this print would be a good test.
I was quite impressed by how solid and strong this print felt, although I have yet to use it for making cookies.
Then, while browsing MakerWorld, I found out that 3D printing images is not unheard of and it’s done with a software called HueForge, which creates printable model that is sliced using very thin layers (like 0.06-0.08mm), resulting in gradients of color such that the printed image appears to have many shades, even though it may only use two filaments of different color. Despite this automated method of creating 3D prints from an image, my method (vectorizing a photo with very limited color palette in Illustrator and bringing it into 3D app for extruding areas of color into 3D model) is still something that I may continue playing with it, because my idea was to use different infill patterns (as opposed to solid very thin layers) to create color blends and shades. For now here’s the frog I printed from MakerWorld, intended to give me an idea how regular (not “fast” filaments) perform:
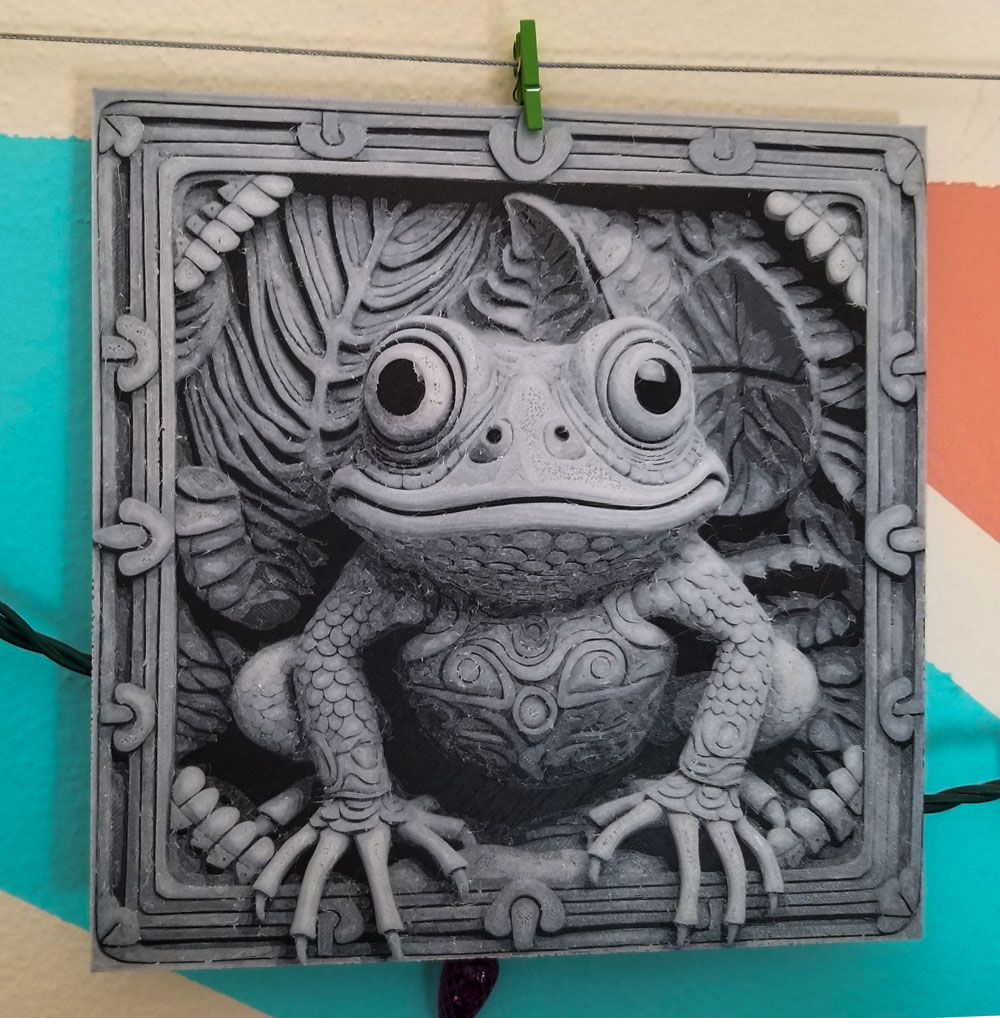
The black color was printed with Overture Eco PLA in midnight black, and white is the above mentioned PLA that came with my old printer. There was quite a bit of ooze that I had to clean up, and there’s still some remaining, but overall I thought the print turned out pretty good. The ooze is likely due to this white filament sitting out without a bag for years, resulting in moisture absorption. Qidi is about to release a Qidi Box, their AMS (automatic material system) solution featuring 65℃ drying while printing, and that’s going to be shipped in September of this year, so I’m looking forward to getting it and trying it out.
Next thing I wanted to test was printing with ABS. I tried the Zyltech green ABS I had, and it printed really well, no problems at all with adhesion. There was only a single limb of three minecraft cats I printed that came unstuck during the print. Keeping in mind that these are very small objects with small adhesion area printed without a brim that would help with adhesion, I’d say printing with ABS is a breeze with Plus4. I tried using a glue stick that came with a printer, but realized that it’s not even necessary if I wipe the build surface with isopropyl alcohol before each print, to remove any grease from handling the plate. I printed bunch of Minecraft characters, because we were going to a 10th birthday of our former neighbor’s son, who loves Minecraft. The prints included a pick axe, sword, skeleton, cat, axolotl, and an attachment for the zipper I have sewn onto a pouch I made with Steve’s face patchwork:

Not all of these items were printed with ABS, but I got a hang of printing with heated chamber and changing the filament back to PLA. Qidi recommends changing the nozzle when printing filaments that melt at different temperatures, and even though I did get extra nozzles, I thought that it wouldn’t be necessary to replace the nozzle each time I want to print with ABS, so what I did was set the temperature to 250°C when loading PLA after unloading ABS, to make sure that any ABS still in the nozzle would melt and exit the hotend – and it worked just fine. Plus4 will purge onto a dedicated area at the back of the printer; it will wipe the nozzle and cut the filament with a blade when unloading, so at the back of the printer there’s a hole that will dispense the purged filament, and that’s appropriately called the poop chute. Plus4 owners have created and shared various poop chute models for printing that will act as a slide for this poop to come to the side of the printer where it’s easier to collect and dispose of, but I still have poop shooting behind a printer and every once in a while I’ll just pick it up from the floor and throw it away. And yes, I keep this printer on the floor with ceramic tiles, because I tried initially keeping it on a table and there was too much shaking at high speed printing that I decided to put it on the floor, as the most stable option.
This printer utilizes VFA (fine vertical artifact) avoiding algorithm, which is intelligent avoidance of the resonance region on the XY motor, and I believe that calibration called input shaping is used to figure out the resonance printer produces at high speed printing and this algorithm calculates compensation or avoidance pathway for this resonance from the data collected during input shaping, where the whole toolhead vibrates very fast, creating lots of noise and shaking. As a result, the print looks very smooth along vertical axis, as all the layers are lined up perfectly.
It seems to be a common practice for printer manufacturer to put out a customized version of a popular slicer that has their latest printers all properly defined, along with their filaments. While Creality has released a customized version of Cura which I initially used for CR6-SE, Cura doesn’t even have Qidi as a company listed in their printer selection, but that’s OK, because Qidi has made a modified version of Bambu Studio (called QidiStudio) and Prusa Slicer (called QidiSlicer) – so now I got to use and learn two great slicers that seem to have even more features than Cura. I may switch to Bambu Studio and Prusa Slicer when they add Qidi Plus4 definitions (or see how to do it myself), but for now I’m perfectly happy with Qidi versions, and Qidi did recently release new version of Qidi Studio, so maybe new updates from Bambu get integrated into Qidi version.
Here are some more prints I’ve made, most of them from models I got from MakerWorld (that’s Bambu Labs model sharing website), except for the sticky note holder and the soap dish, which I modeled myself:

The fan and sticky note holder are printed with Qidi’s PLA Rapido, the yoyo is printed with PETG, the slinkey was printed with Overture’s blue and silver dual color silk PLA and the soap dish has purple PETG for base and top plate is printed in Overture’s purple and gold dual color silk PLA.
One thing I’ve learned while doing these prints is that the most common file format that people share is no longer .stl, but rather .3mf (3D Manufacturing Format). This format is created and read by the slicing software and contains all the adjustments of the print settings, manually created supports, printer and filament profiles, thumbnail, project description, and, of course, 3D models – and there can be more than one in the scene, arranged on one or multiple plates. The STL file can be exported out of the slicer, so if any modification is needed on a 3D model, the file can be brought into 3D modeling program and exported after changes are made, and then the old model in the slicer can be replaced with a modified one. I didn’t realize that .3mf are used so that specific parameters are modified for printing to be as intended, so I got this print-in-place fan that came in .3mf format and exported it as .stl and brought it back into a new QidiStudio project, because I wasn’t sure about using project file that someone has set up to work for Bambu printer and Bambu filament, but that was a mistake on my part. I essentially screwed up this print, because in provided .3mf file the layer thickness was set to something like 0.3mm, while my setting remained at default of 0.42, which then caused the slicing process to not create any print lines inside of a very thin channel around the holes that’s supposed to keep the adjacent blade sliding through this channel and instead printed a large hole which did not keep the blades together, prompting me to glue a ribbon as a remedy. Digging my way into a new territory is wonderful, as I get to learn so much by making a bunch of mistakes.
Almost forgot about the other soap dish I made for kids’ half bathroom. This dish, like the purple one above and unlike the rosetta topped dishes I was printing previously, has a sloped bottom so that water can flow out through a hole. This is actually one dish with two interchangeable plates:

Finally, I used the printer to make prototypes of a car part. Namely, it’s a trim piece that gets screwed over a cut out hole on a B-pillar and the seat belt comes out through it. It is for e28 BMW 5 Series and is no longer available new, and most of these trim pieces still on cars have been broken, considering they’ve been going through heat cycles since being manufactured sometime during 1981-1988. My partner has had probably close to a dozen of these e28s over the years, and still has one (actually 2), so we used its B-Pillar to test out the fitment, and an e28 enthusiasts friend has sent him an unbroken part that I used to make a 3D model from. One of the main reasons for getting a heated chamber printer was to be able to reliably print high performance and industrial grade composite filaments such as ABS, ASA, PA, PAHT-CF, ABS-GF, PPS-CF, UltraPA Nylon and so on. I haven’t yet tried any of those filaments aside from ABS of course, because I personally have no need for it, but for printing car interior trim pieces ABS and PETG are good enough materials to use, with moderate UV resistance. I got two spools of Qidi’s black odorless ABS (it’s not really odorless, but since it’s being printed inside closed enclosure that vents printing fumes through an activated carbon filter, the smell is really not that bad), and used that to make print after print of this part, modifying certain aspects of the model, such as the inner lip that hugs the hole cut out in B-pillar board and vinyl it’s wrapped in, or the placement of the slit, which is not part of an original design but is extremely helpful because the seat belt needs to go through the hole and so without this slit, the whole seat belt insert would need to go through the hole, which might result in breakage. Also, the orientation of the model during the print took many attempts: when model is sitting at slight angle with it’s short side on the plate results in best looking print, however this print is the weakest (the broken pieces seen in the right image below show how this orientation will break the print while sliding the belt in), yet it uses the least amount of support and hence leaves most surfaces looking good. The orientation that will likely be used for mass production is as pictured in the left image, with the thin side below the screws sitting on print surface. However, that orientation leaves the visible (uncovered by belt) side of the hole scarred with support removal and slightly drooping lines. I may wait for the QidiBox to try printing the support interfacing with different material that will not bond with ABS so that the top interfacing layer can be printed with no gap between it and overhang and the support snapped off without scarring the surface. I also tried using rotary tool with various sanding attachment to improve the look of this surface, but it resulted in damaging other surfaces, and frankly, I don’t want to do that work to every printed piece. It should be good as it comes out, and whoever wants to use it can do the finishing work themselves.

And here is the only issue I experienced so far, and it’s not related to the printer, but to an extra build plate that I got. This plate is made of smooth PEI sheets glued to a spring steel, and when I change the build plate in QidiStudio from default textured plate to smooth PEI plate, the bed temperature is lowered to 45°C, and when I print at this temperature ABS will warp, because it’s cooling too fast, resulting in a distorted print if it even stays stuck on the bed. So I can’t really print with ABS on this plate at that temperature, and since the description of this plate states that it has “High-Temperature Resistance: Perfect for printing high-performance materials that require heated beds, withstanding high temperatures without warping or degradation” – I thought it meant that bed temperature can be as high as I need it to be, so I changed it back to 90°C and made a few prints. After a first print, I noticed a bunch of tiny bubbles all over the plate on both sides. They didn’t seem to worsen with subsequent prints, but then I noticed that the surface of the plate where the print was sitting had a concentration of bubbles and with my fingers I could detect a slight bulging over this concentration of bubbles. That’s the only disappointment I had so far – the smooth plate costs $60 and doesn’t do what it’s supposed to do. Below is the photo I sent to Qidi support, explaining what happened, and asking how the heck am I supposed to print ABS that requires 90°C bed which destroys the 3M adhesive holding PEI sheet to the steel plate, but they never replied, so I’ll have to figure that out, or try contacting them again.

On a bright side, I ordered 4 extra plates for the printer that cost between $14 and $20, and those plates have different patterns with holographic or textured effect on either side, and these effects are transferred to the first layer of the print. These holographic effect plates were actually for Bambu printers and sized 257x257mm, so 53mm smaller than the plate size for my printer, and the reason I got them is because there’s way more selection in that size than in 310x310mm size that my printer uses. Additional reason is that I would use these surfaces for mostly flat prints with embedded tulle fabric, so I can’t use the whole plate anyway, because I need place around the print to place the magnets that keep the tulle in place.
I’ve done some research and found out that it won’t be a problem to use a plate that’s smaller than the print bed. Namely, I found out that the klipper, which powers my printer, has a feature called KAMP (Klipper adaptive mapping and purging), and among other neat things it does, it will limit the probing area of bed leveling to the area where the print will be, so that the resulting mesh will be more accurate and no probe information will be wasted. That means that I can prevent printer from probing in the areas outside of a smaller build plate, provided I slice the model in the area that will be covered by this build plate. I am not sure if KAMP was preloaded to the printer or if I actually installed it, because I followed the instructions for installing KAMP that begin with ssh into a klipper device and executing commands that will install necessary files, but I got unknown commands error in Fluidd’s console, even though I then noticed that there is a KAMP folder on printer’s memory and all the configuration files I needed to edit were in place. So from there it wasn’t difficult to get it to work. I’ve done a test print preceded with bed leveling, and the probing really did occur only in the area where the print was going to be.
In the next post I’ll continue with 3D printing projects and I’ll end this post here, since it has gotten too long – if you’ve made it this far, congratulations!