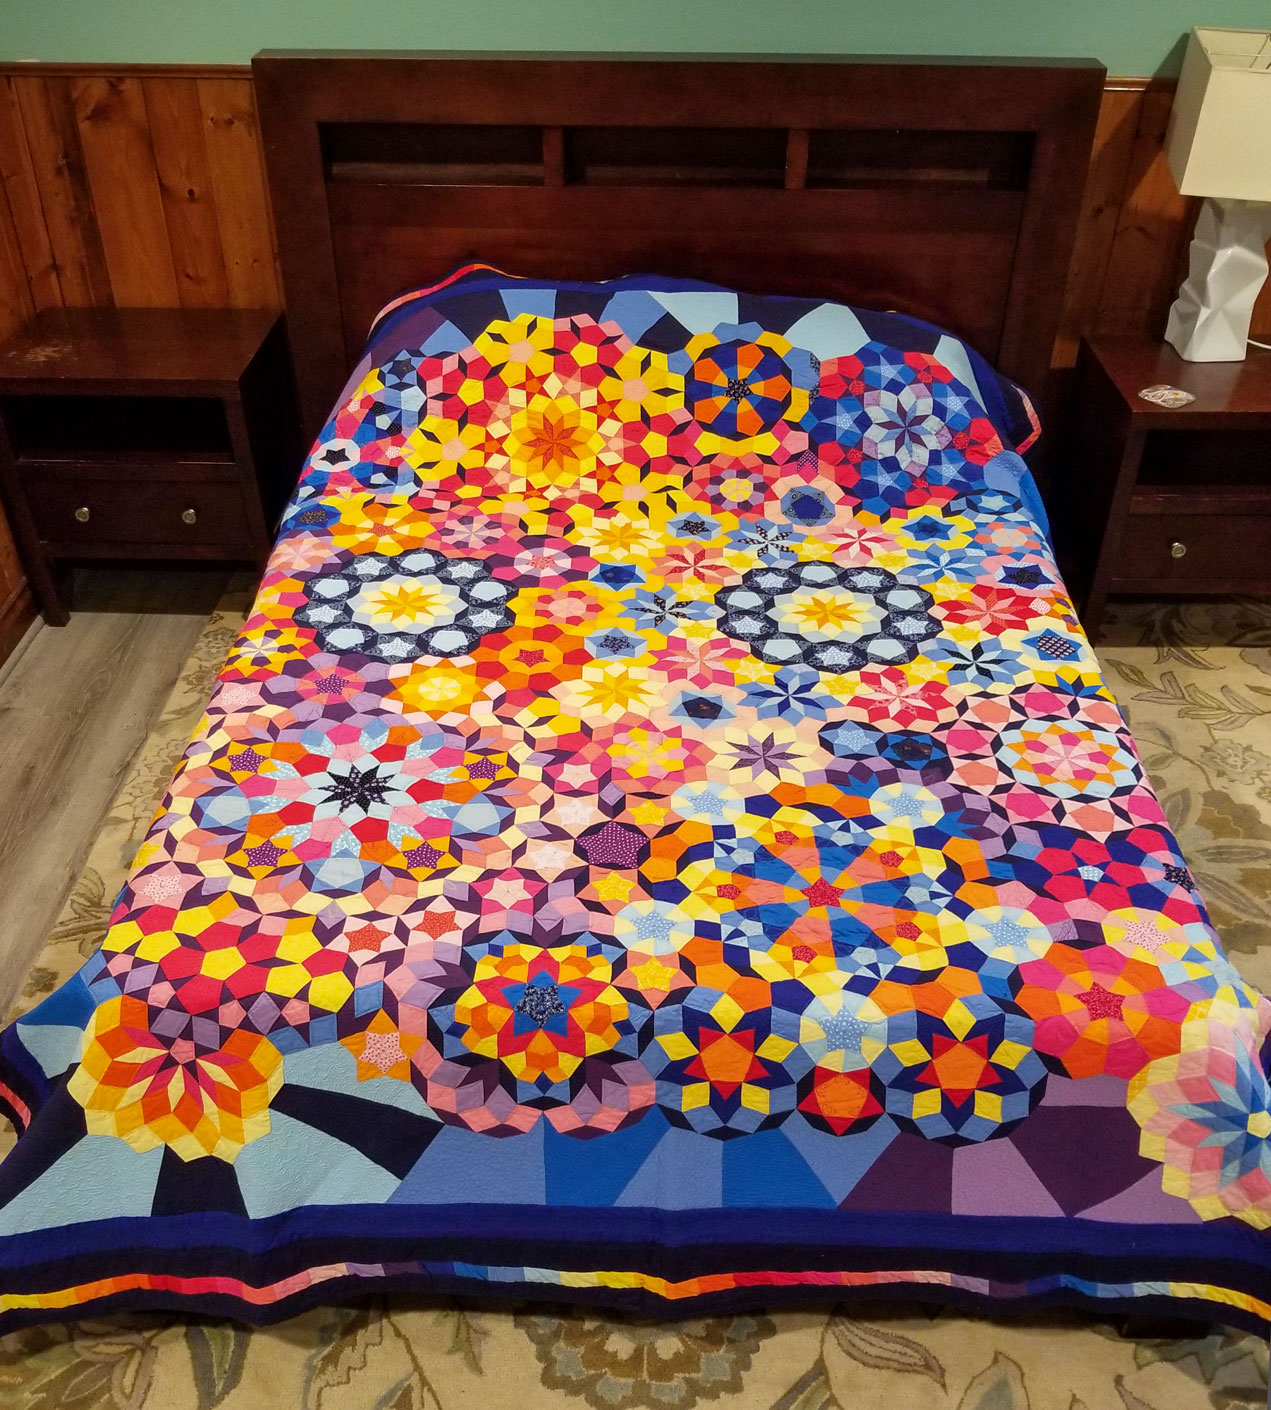
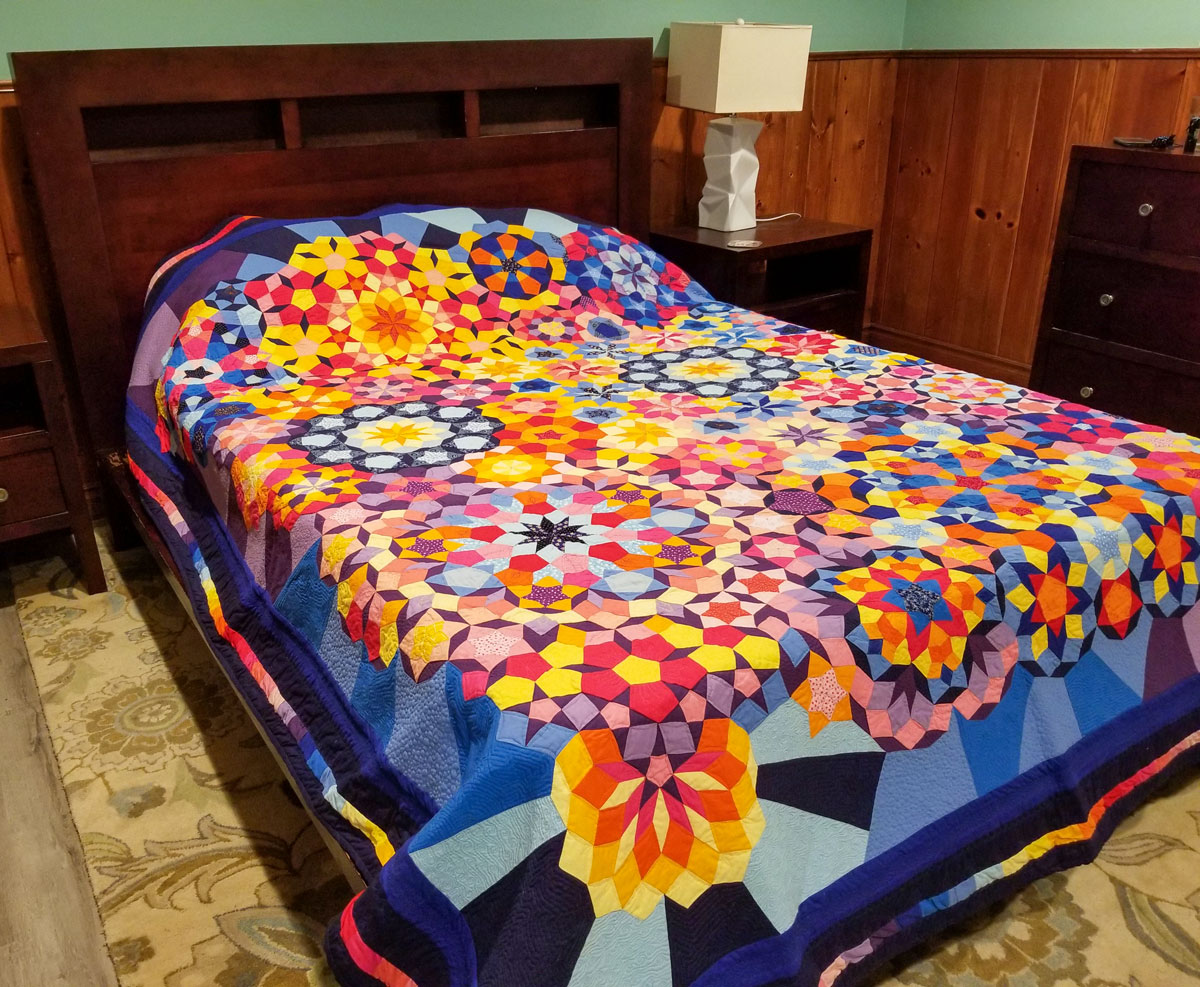
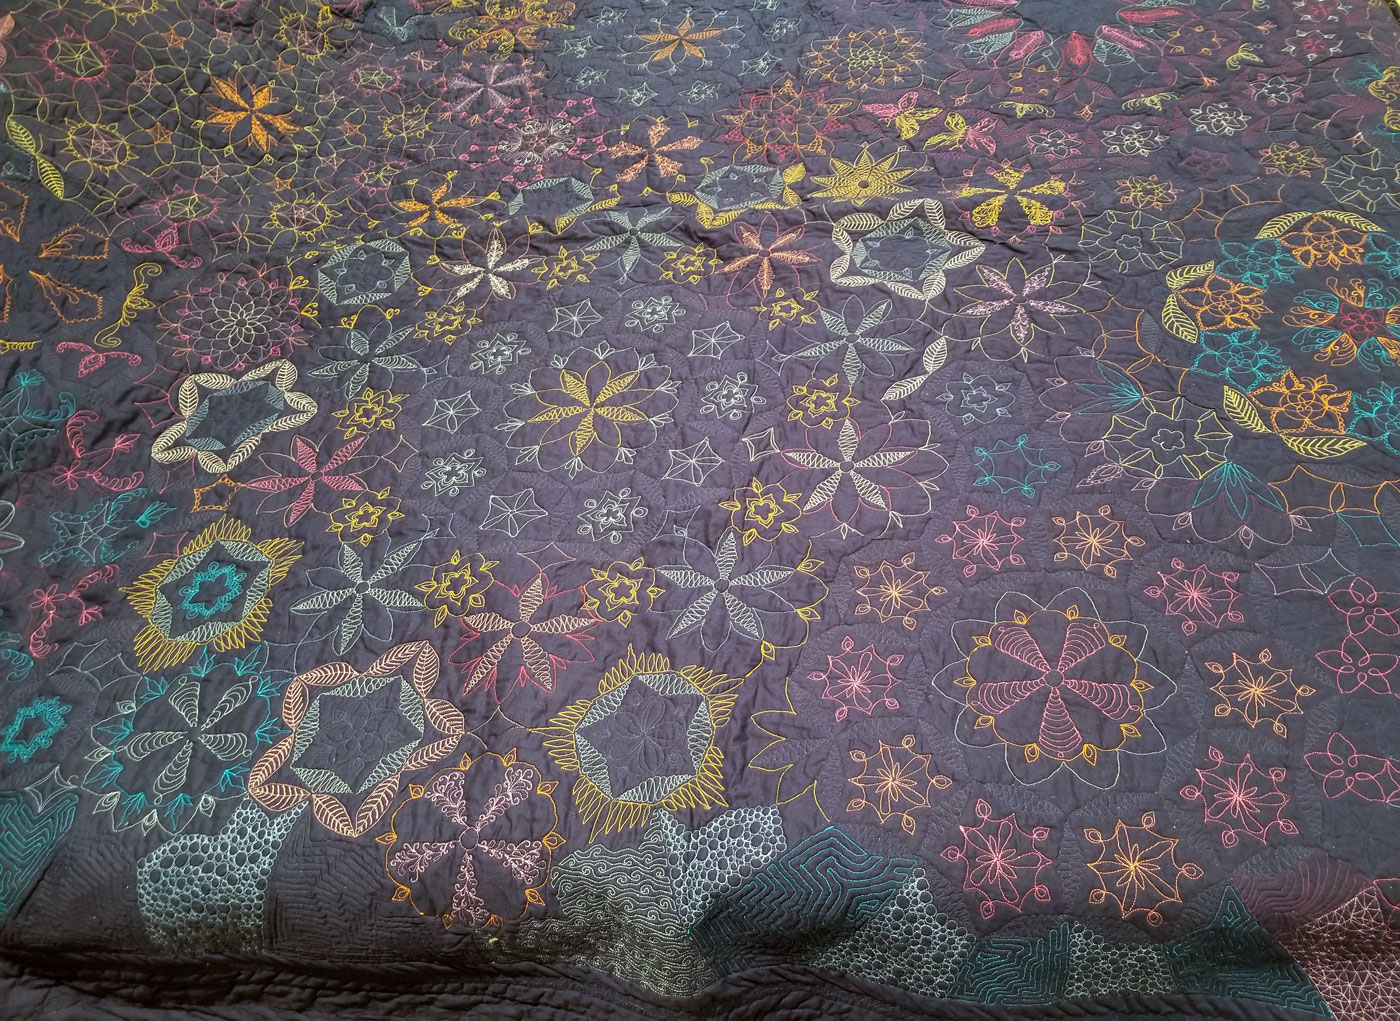
This hand pieced and free motion quilted blanket took me almost a whole year to make. It is queen sized, and I simply didn’t have a good place to take a picture of it. That’s the main reason why I haven’t posted this, even though it was completed over two years ago. The full shot of the completed quilt seen above had a bit of a corner and the edge reconstructed in Photoshop, and despite that still didn’t fit in the frame, even though I had my phone held up against the ceiling, while standing on the bar stool to take a picture of the quilt spread on the floor.
The technique I used to piece this was NOT English paper piecing (EPP), rather it was hand piecing with running stitches. If I were to piece this with papers, I would’ve given up before I finished a single flower – it does not look good, it’s very tedious and time consuming. Not only would I need to cut paper pieces in addition to fabric pieces, but I would also need to perform a basting either with loose stitches or glue to keep paper in place while stitching, and I’m just not in favor of using glue on fabric. I know most people will use EPP for Millefiori, but in all honesty, I think it’s an unnecessary waste of time and material.
My strategy was the same as with my previous Millefiori projects (two pillows and a shopping bag) – I 3D printed the templates of all the shapes (template models are available for download on Thingiverse), and used them to draw lines on fabric: the outer line was used as a guide for cutting and inner line was used to guide the stitching. The precision achieved this way is excellent.
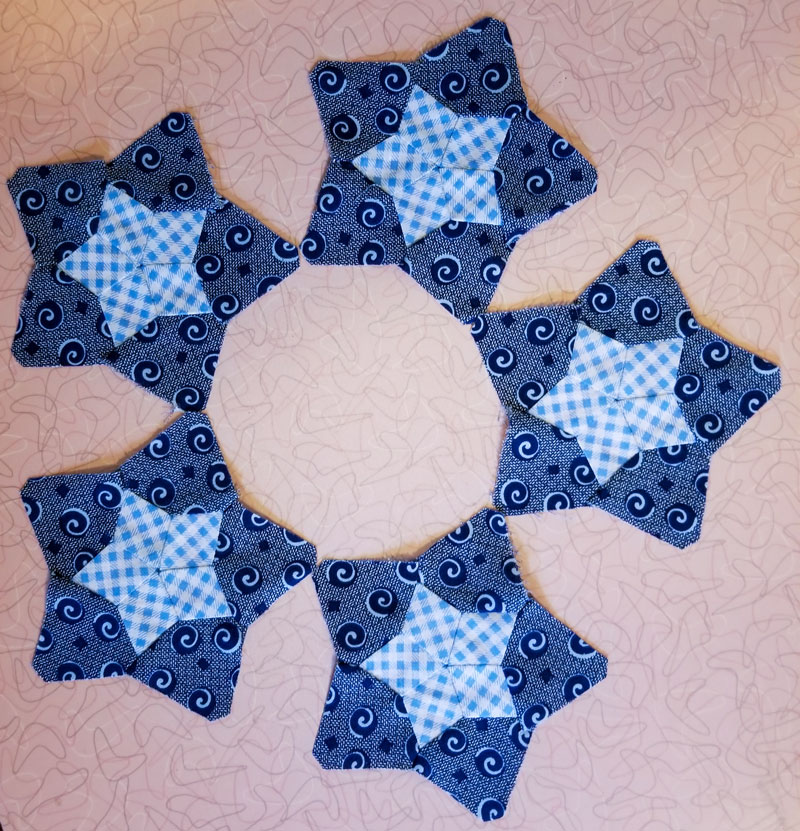
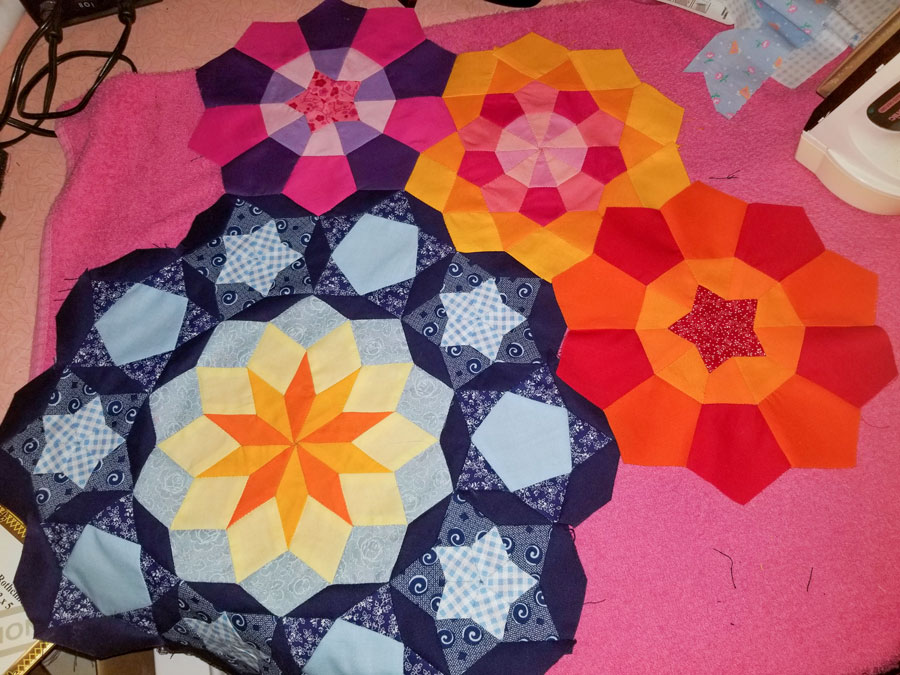
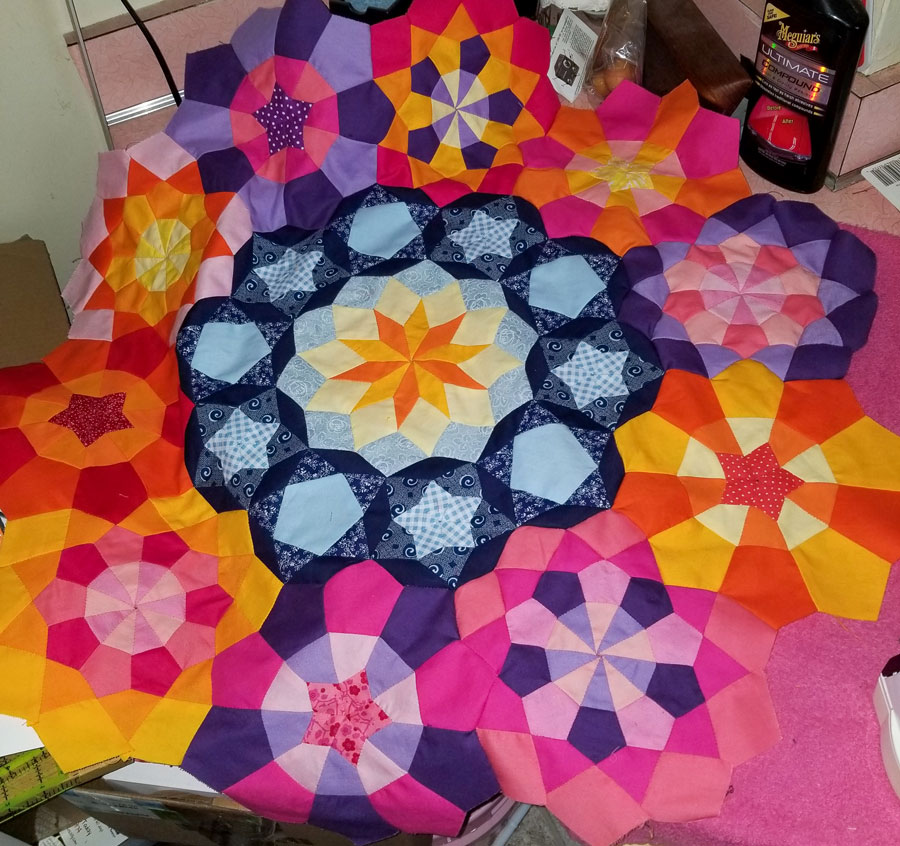
As is often the case, I was very eager to start working on the project and I started stitching, without knowing exactly what is it going to end up being: another bag? A small quilt? I wasn’t sure, but I started anyway:
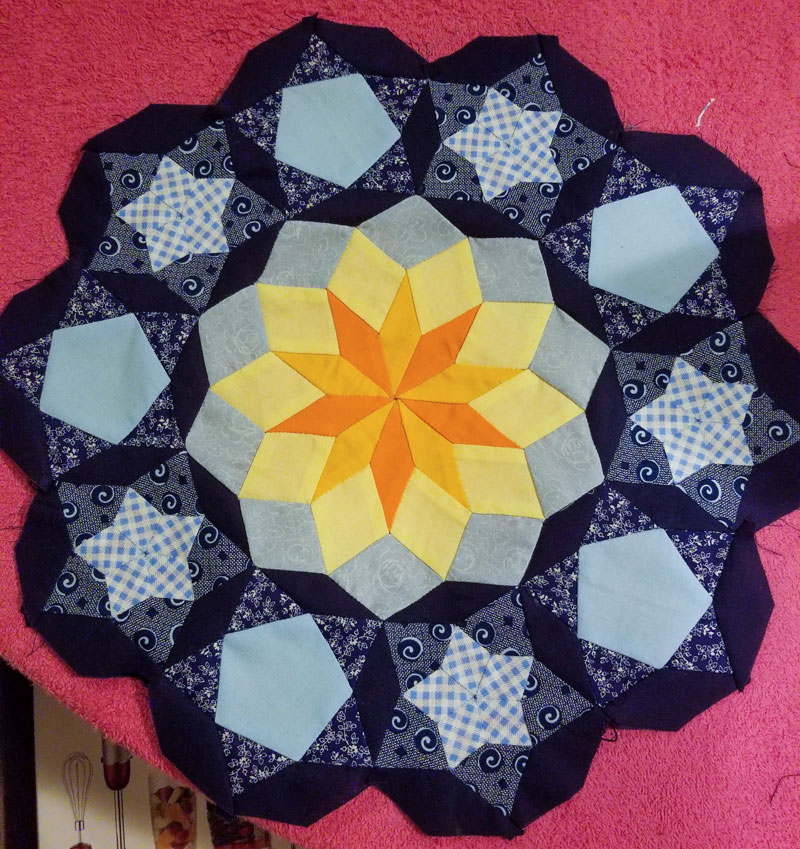
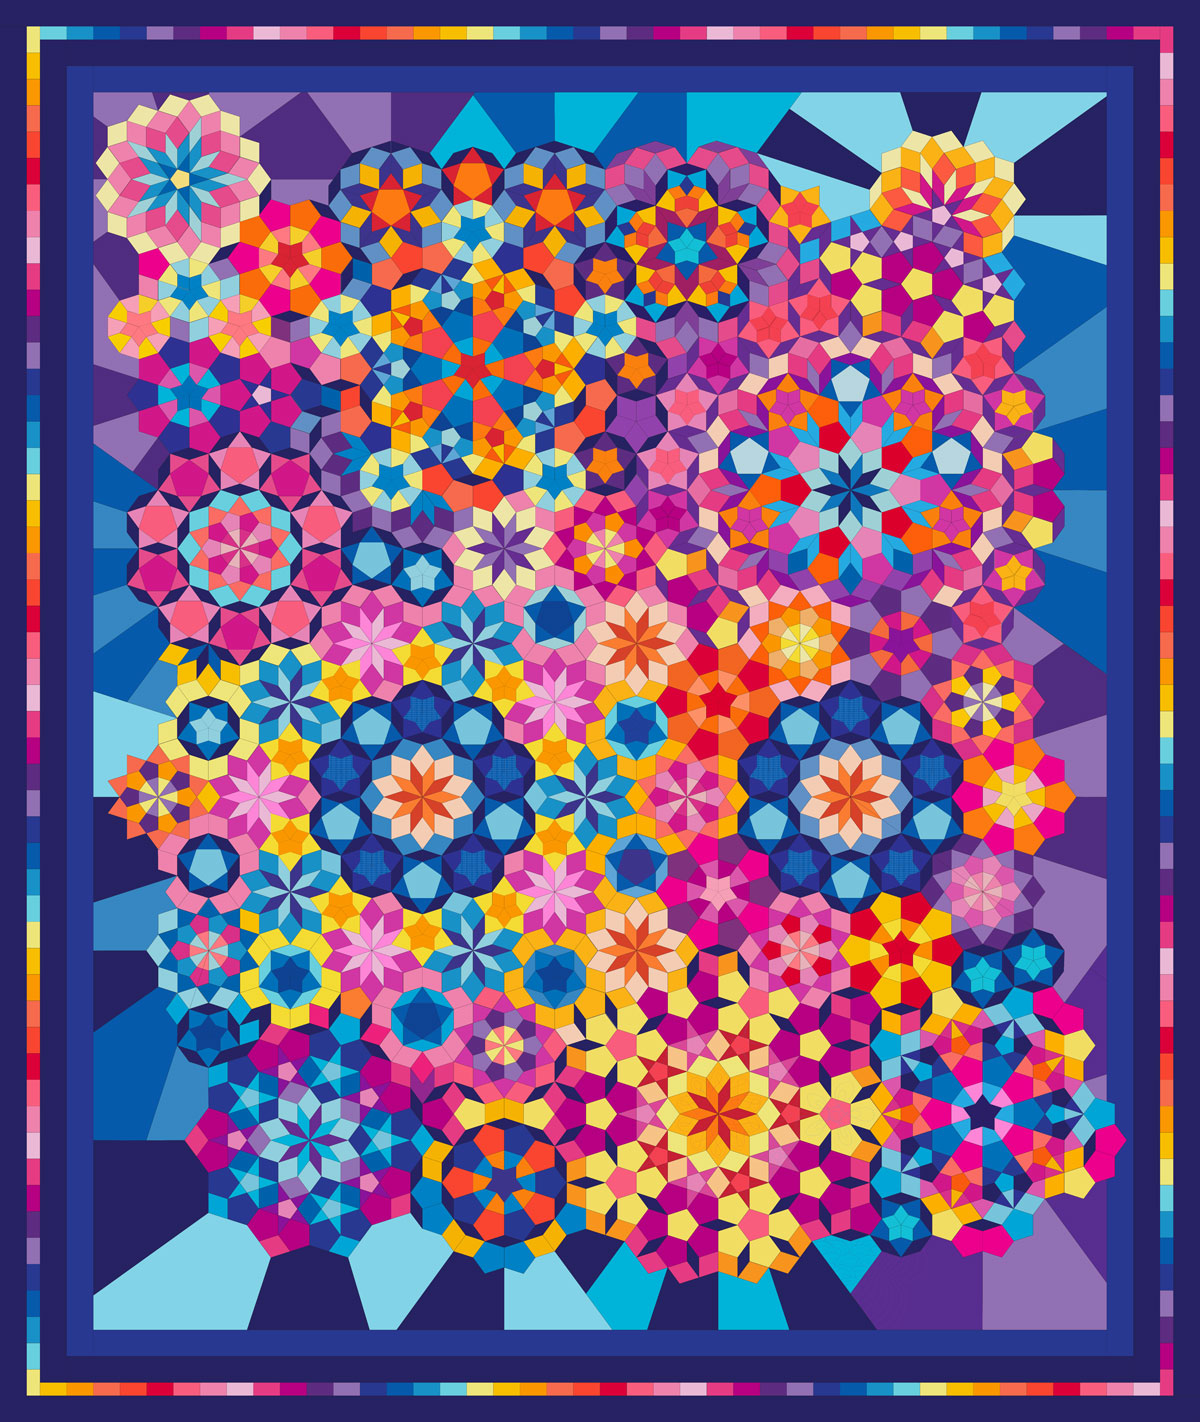
After the first flower was done (second photo above), I fired up Illustrator and started putting together the pattern. I kept adding to it, and it took me some time to get it right, because all the shapes had to fit in perfectly and make sense. And then, I also had to figure out the border. I wasn’t in favor of having sections of the flowers cut off to fit into the frame, so I designed the background such that it looks like rays radiating from the outer flowers in alternating shades, expanding on the theme of the flowers themselves. Here’s what the pattern looked like:
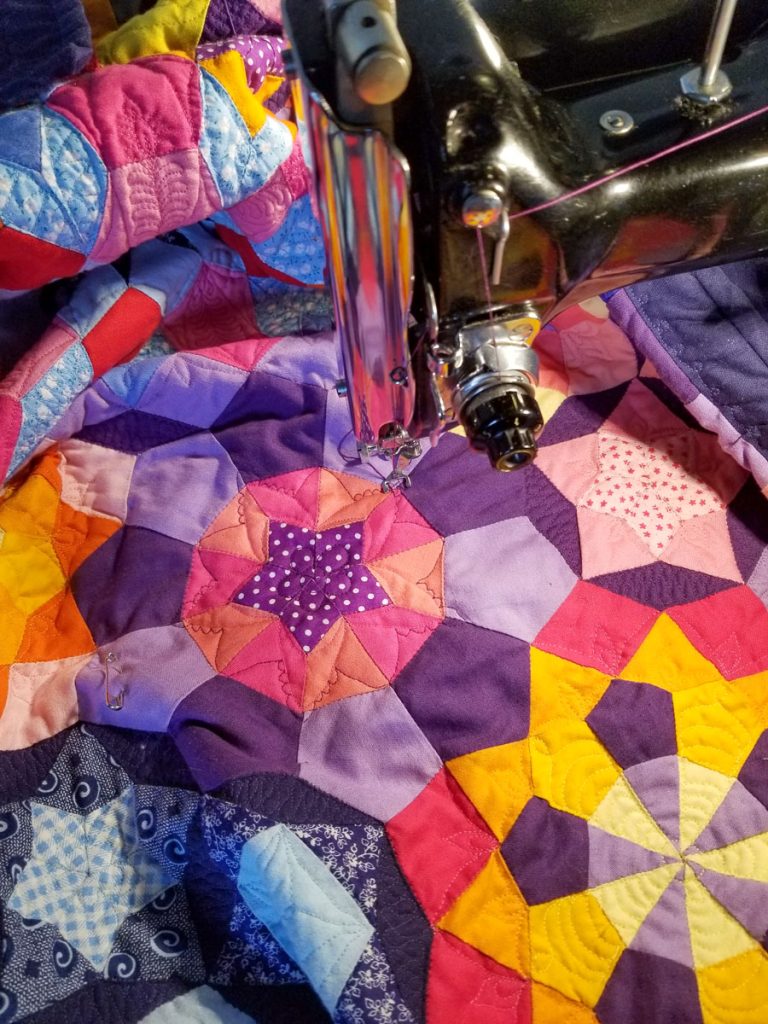
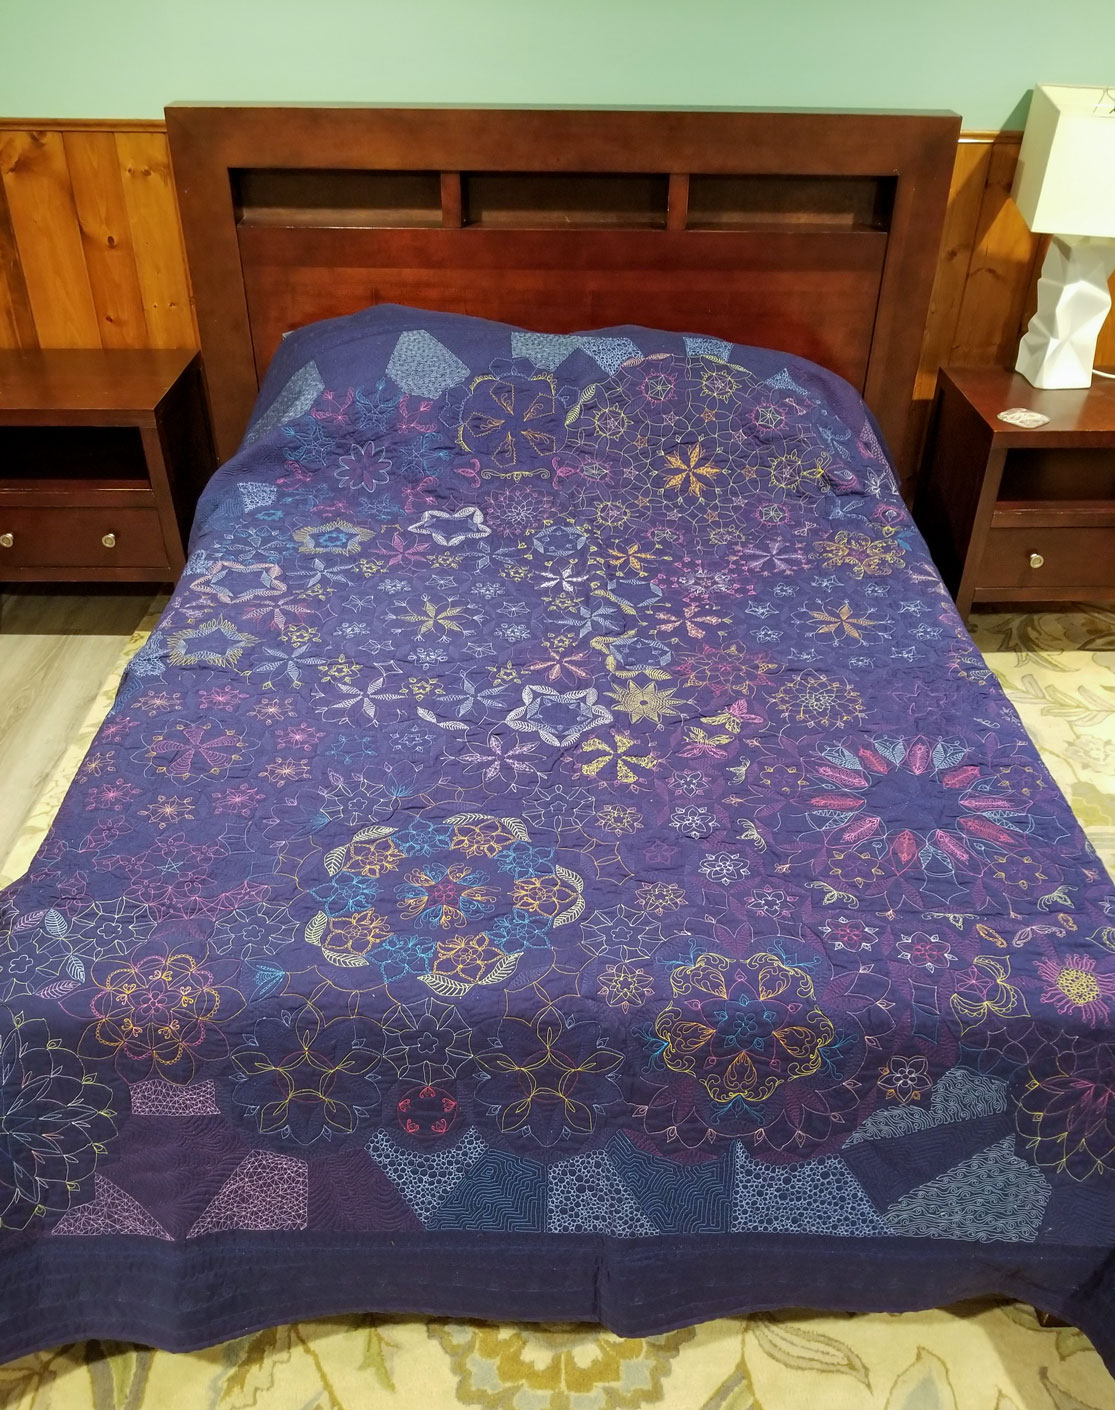
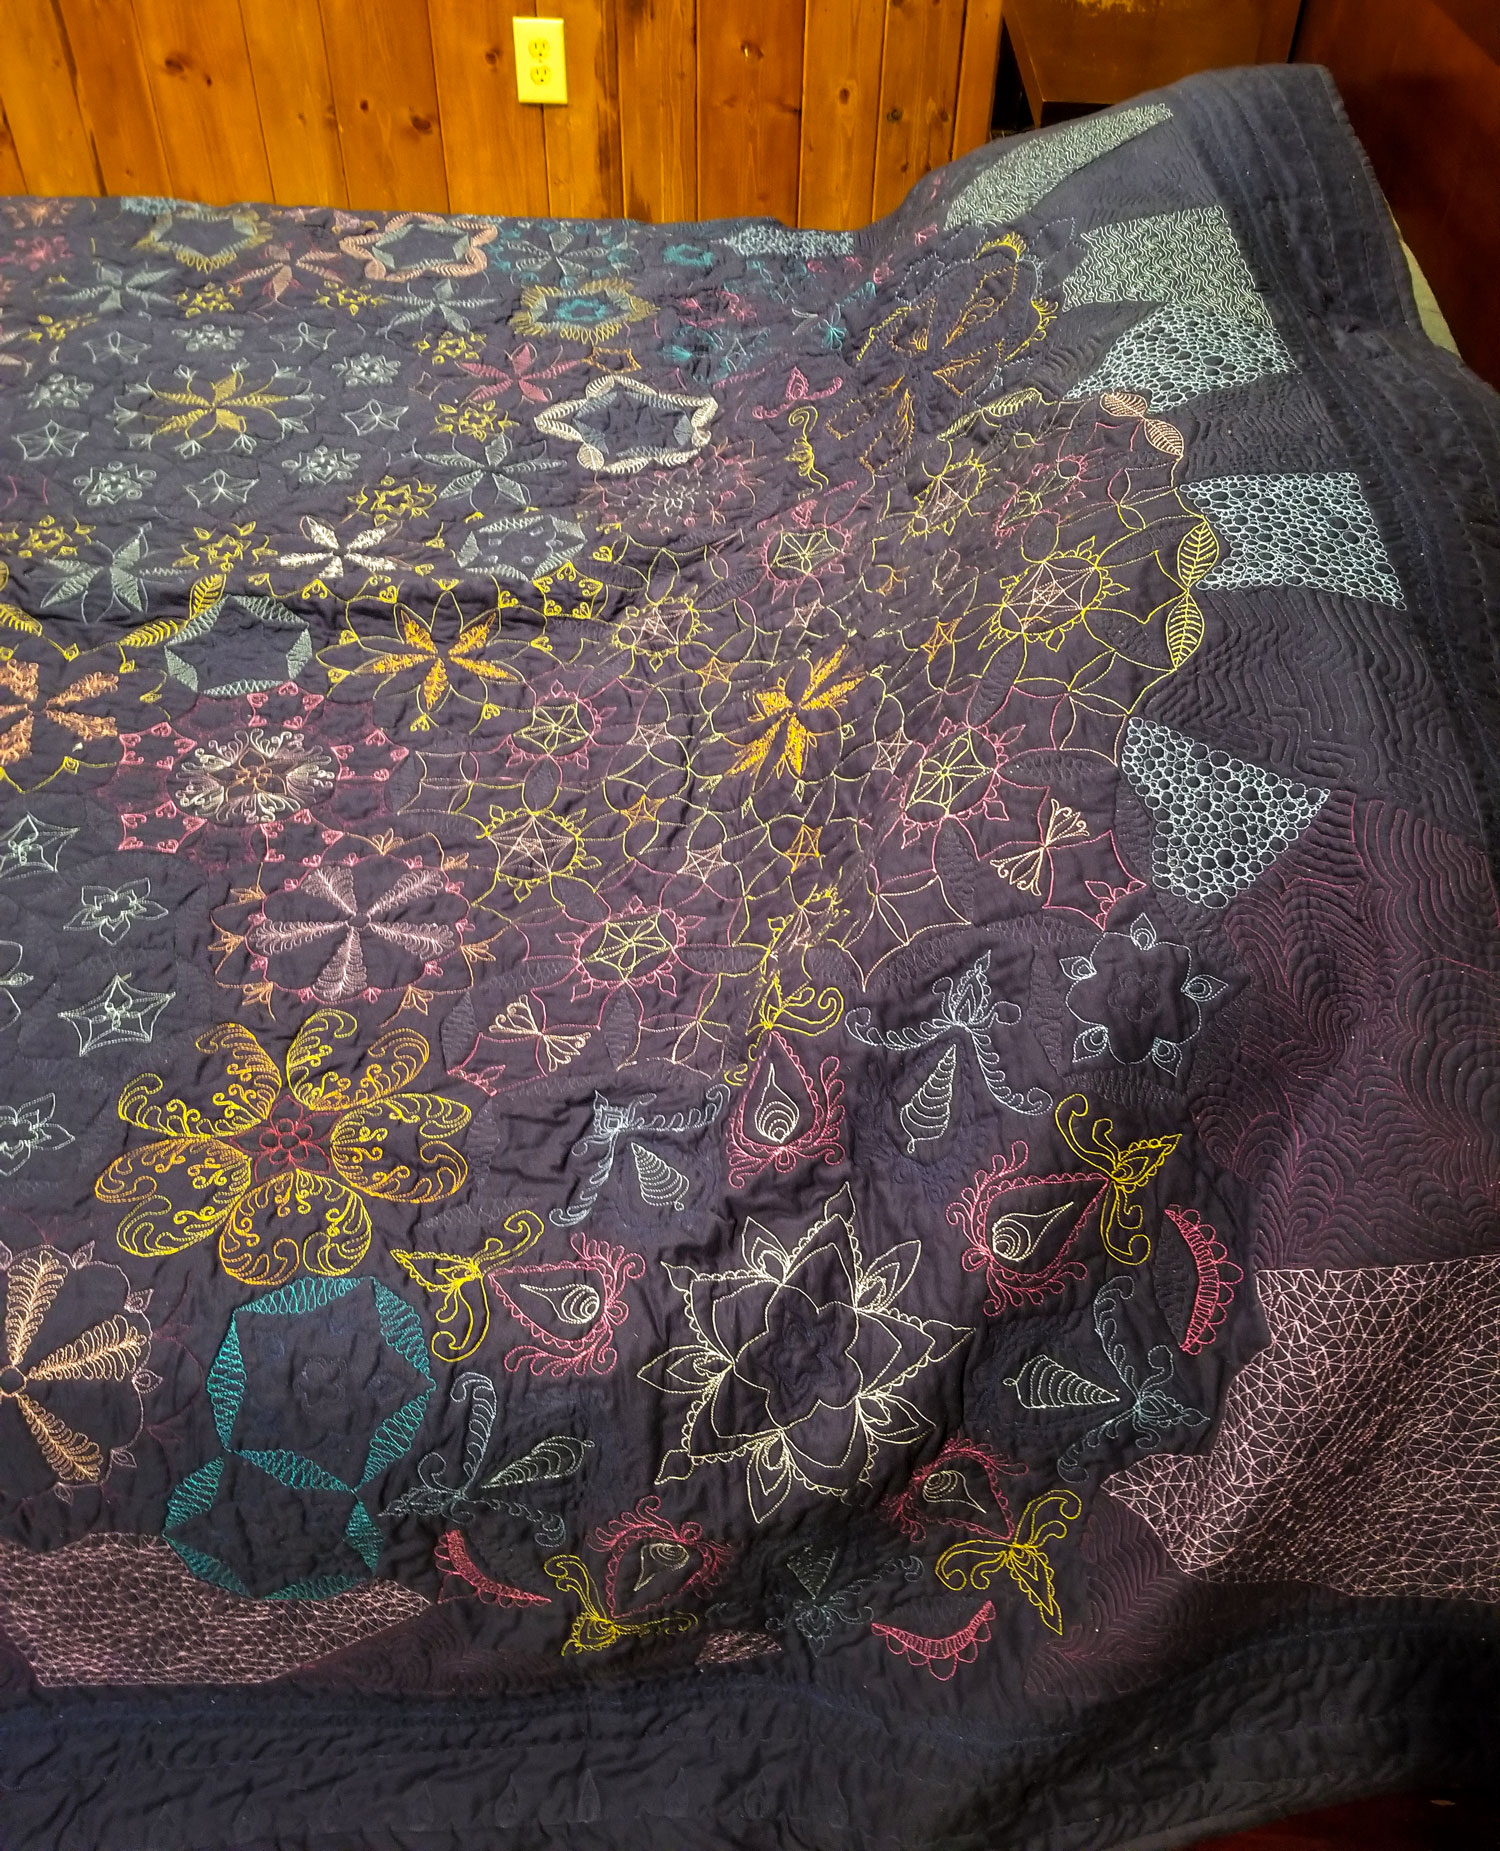
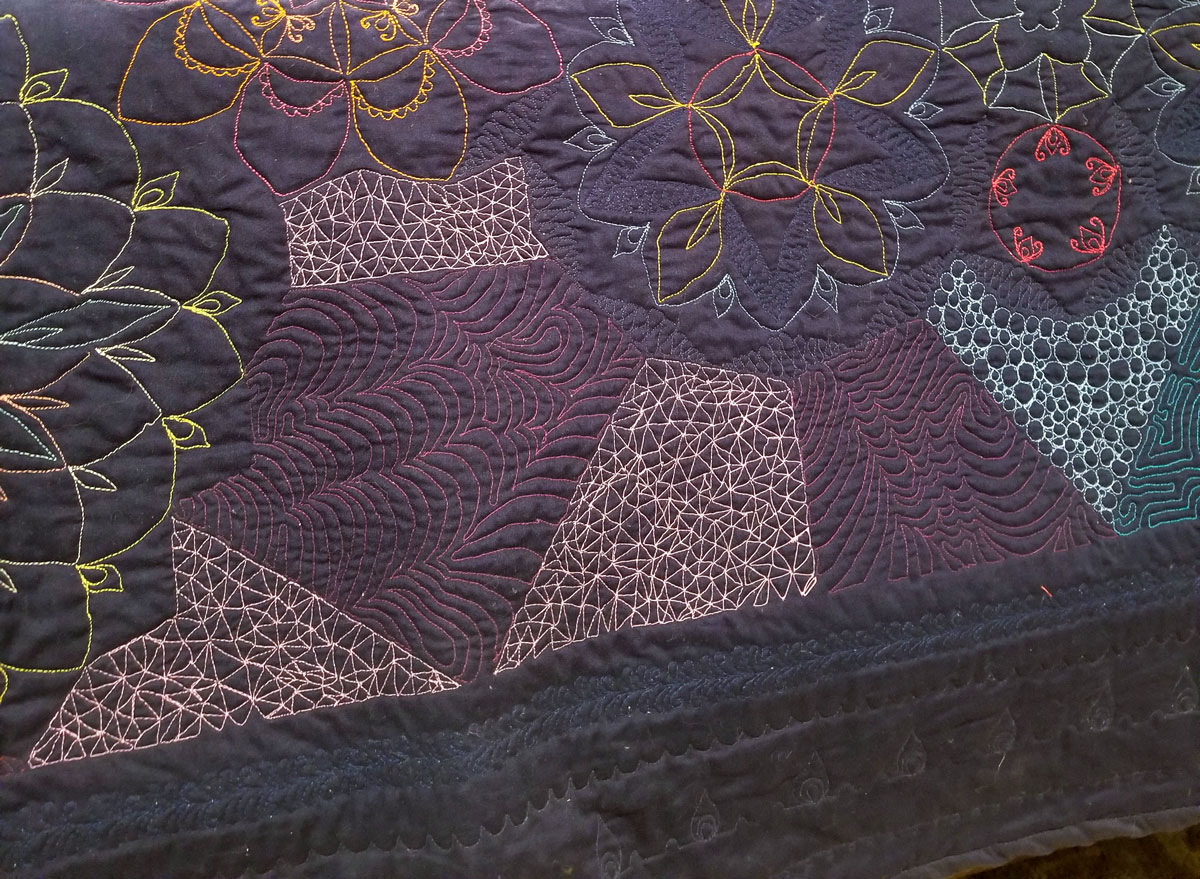
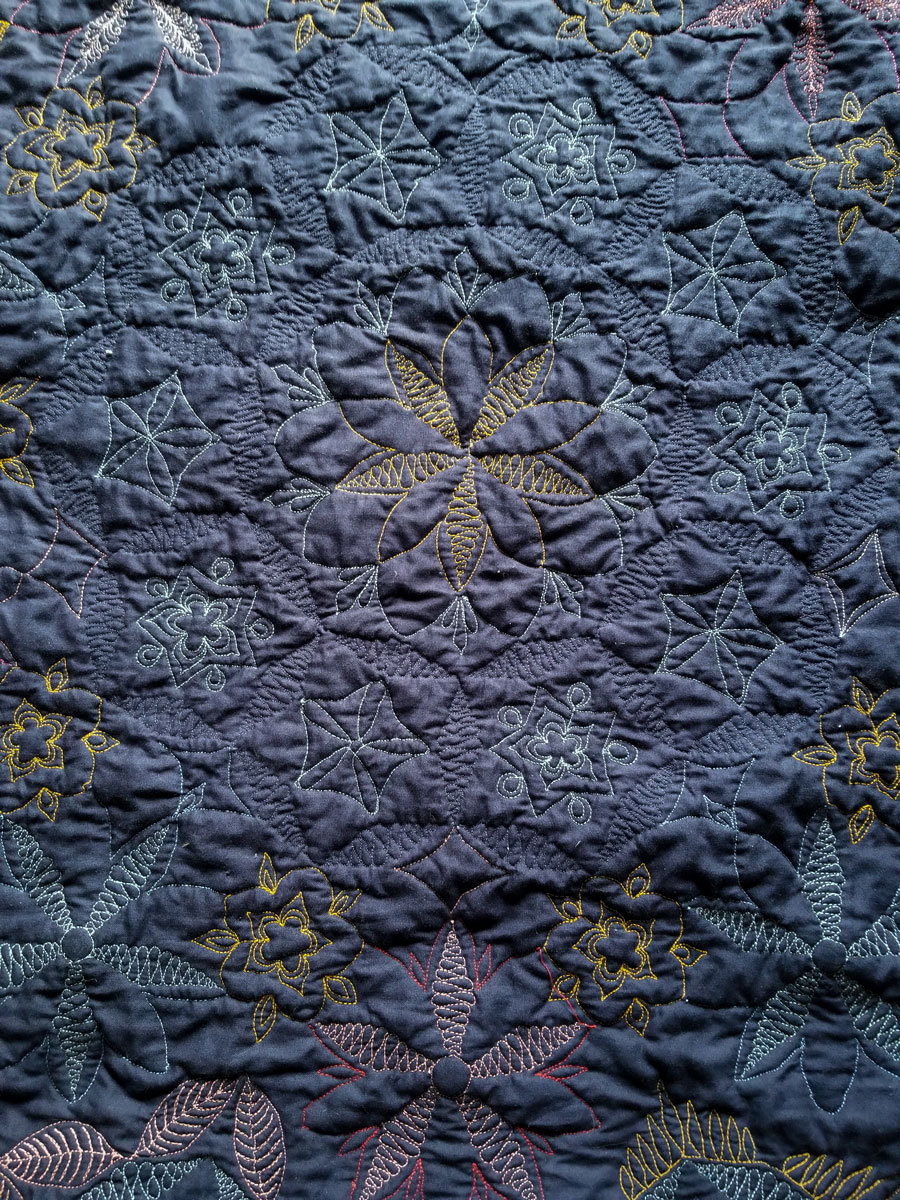
After I finished piecing the patchwork, I wanted to take a break. I made two smaller quilts for my kids, just to feel like I’m getting something done, as opposed to endlessly working on a single project and still being far from finishing. I wasn’t sure if I could pull off the quilting on my Pfaff 130 – not that Pfaff couldn’t handle it, but rather I was a bit concerned with the size and weight of the quilt sandwich and whether it could be navigated around the needle with relative ease. Somehow it worked out. I used threads in different colors that matched the colors of the patchwork, so that quilting isn’t very noticeable on the front side, but it has a whole different look showing up on a navy colored background on the back side. This, of course, allows the quilt to be flipped to either side and still look interesting. Here’s what the quilting looked like:
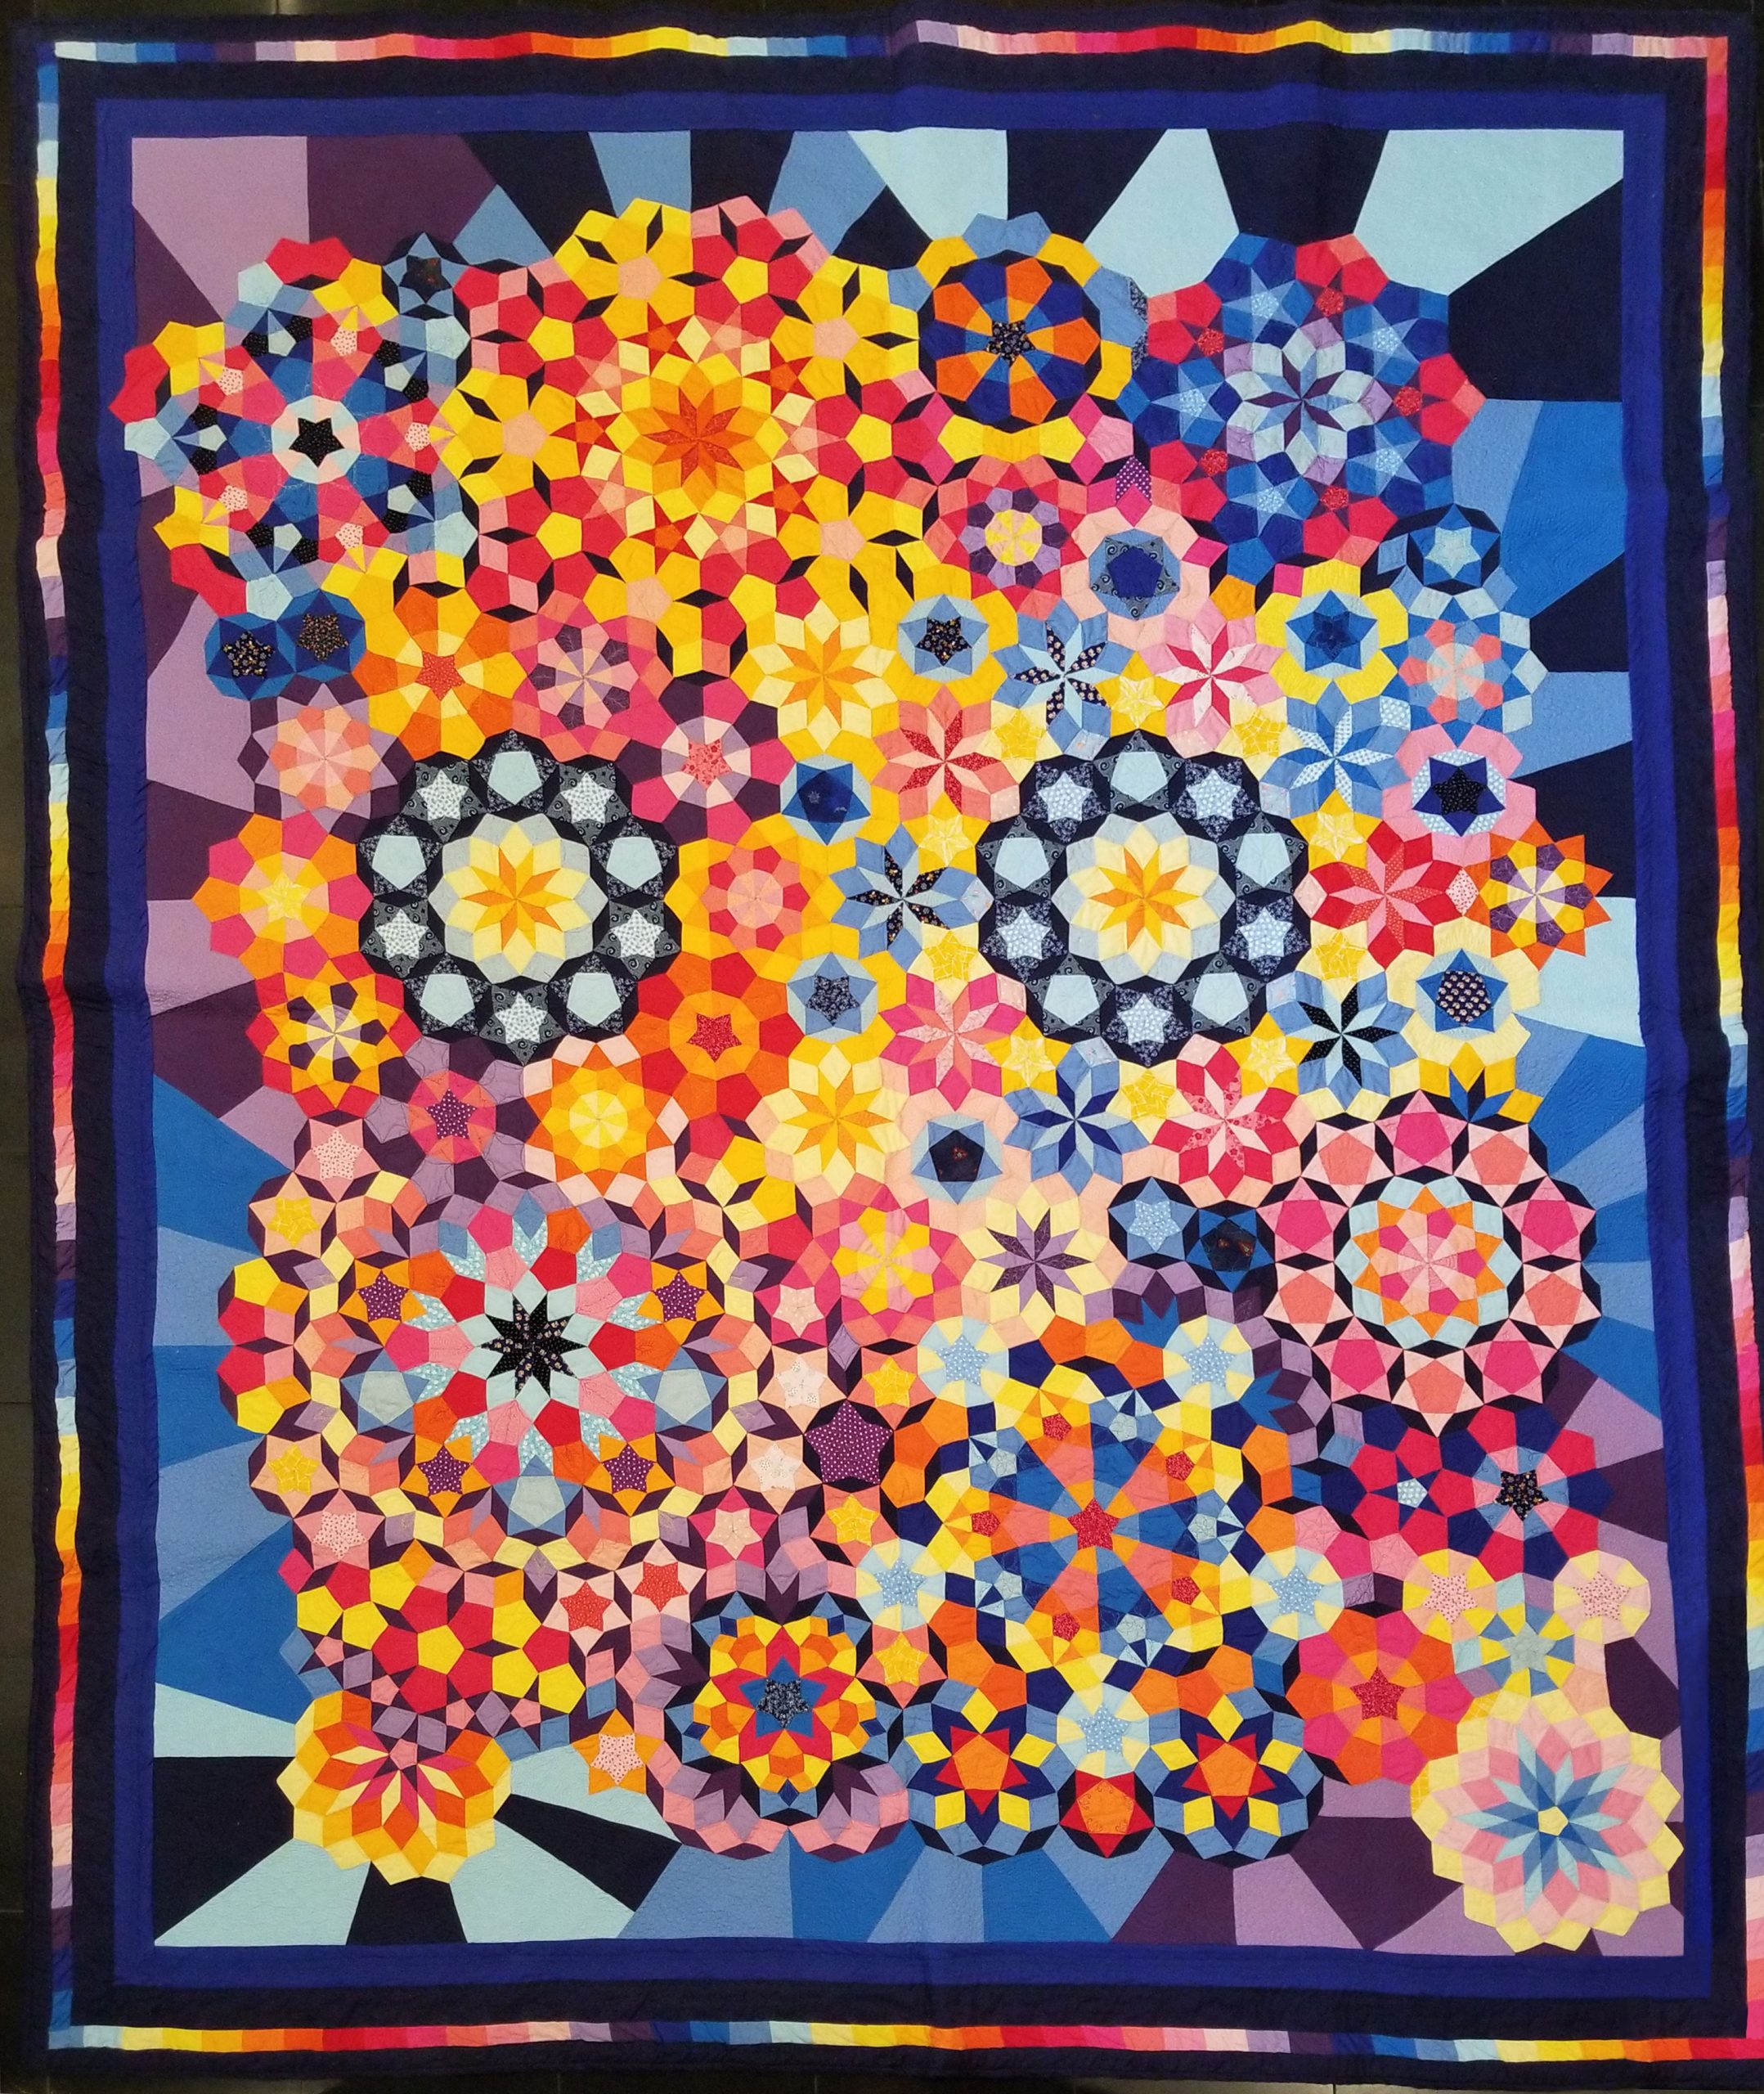
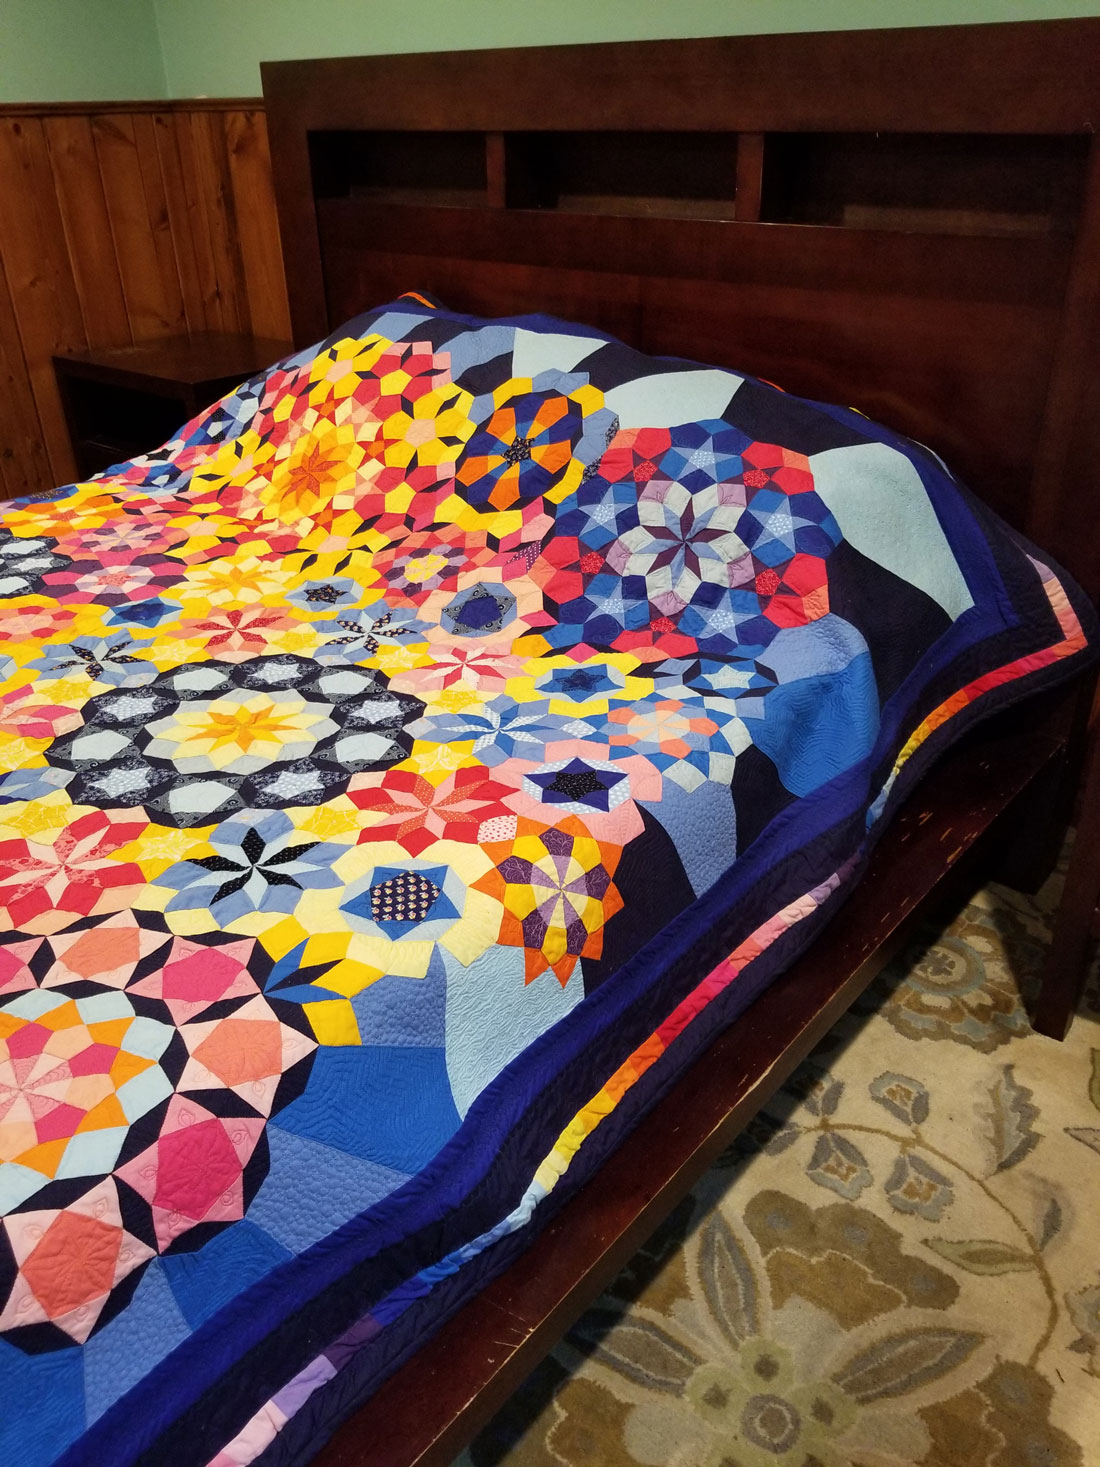
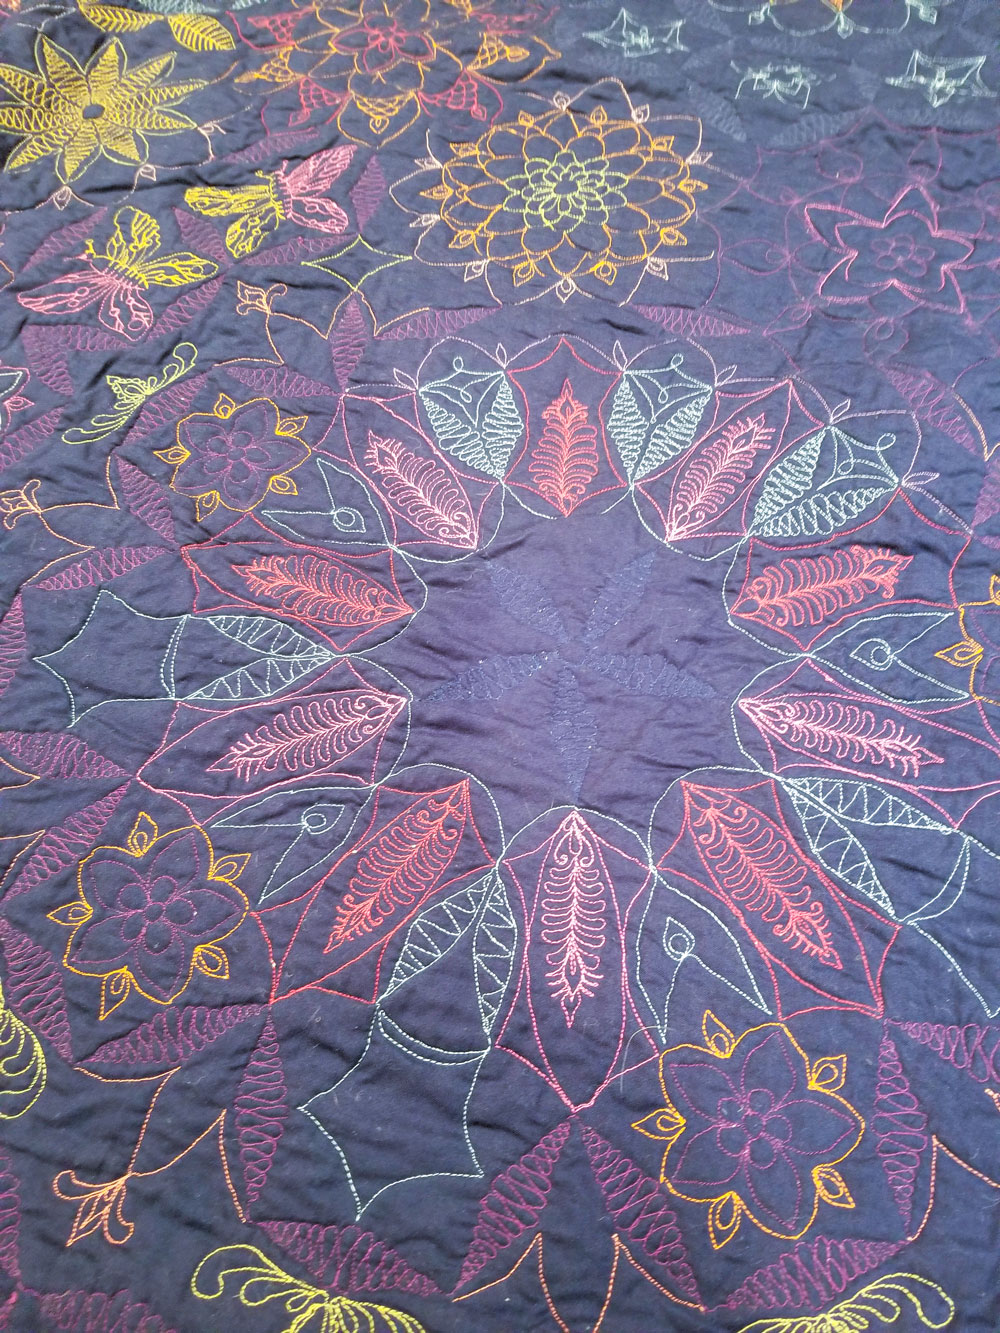
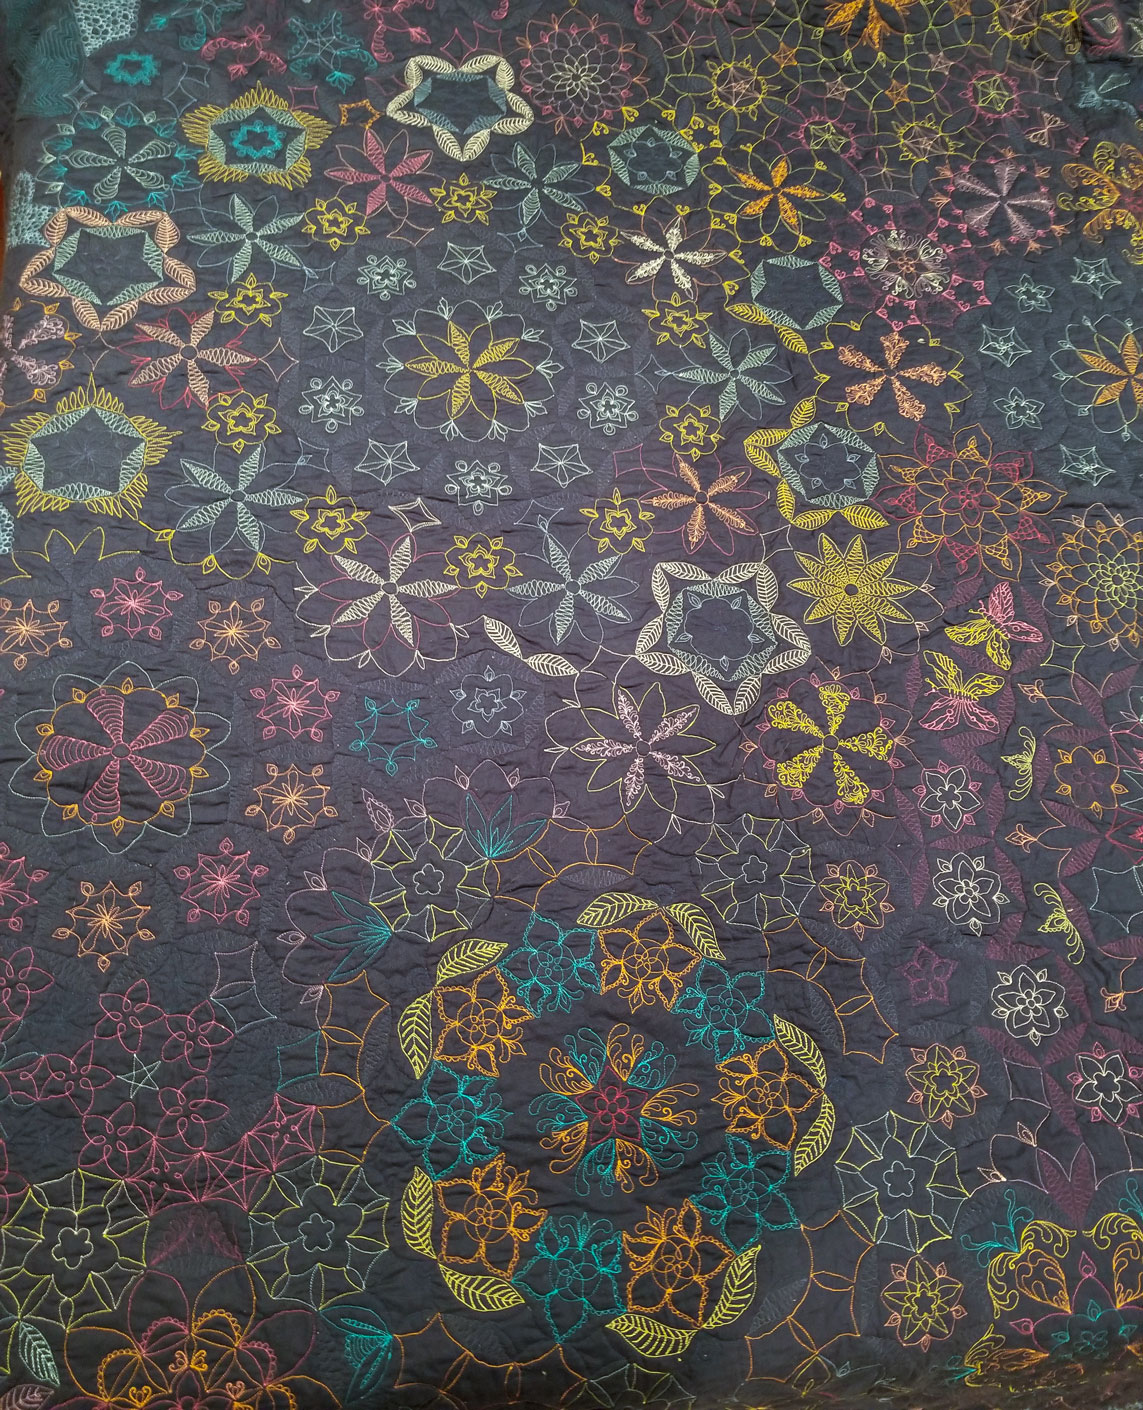
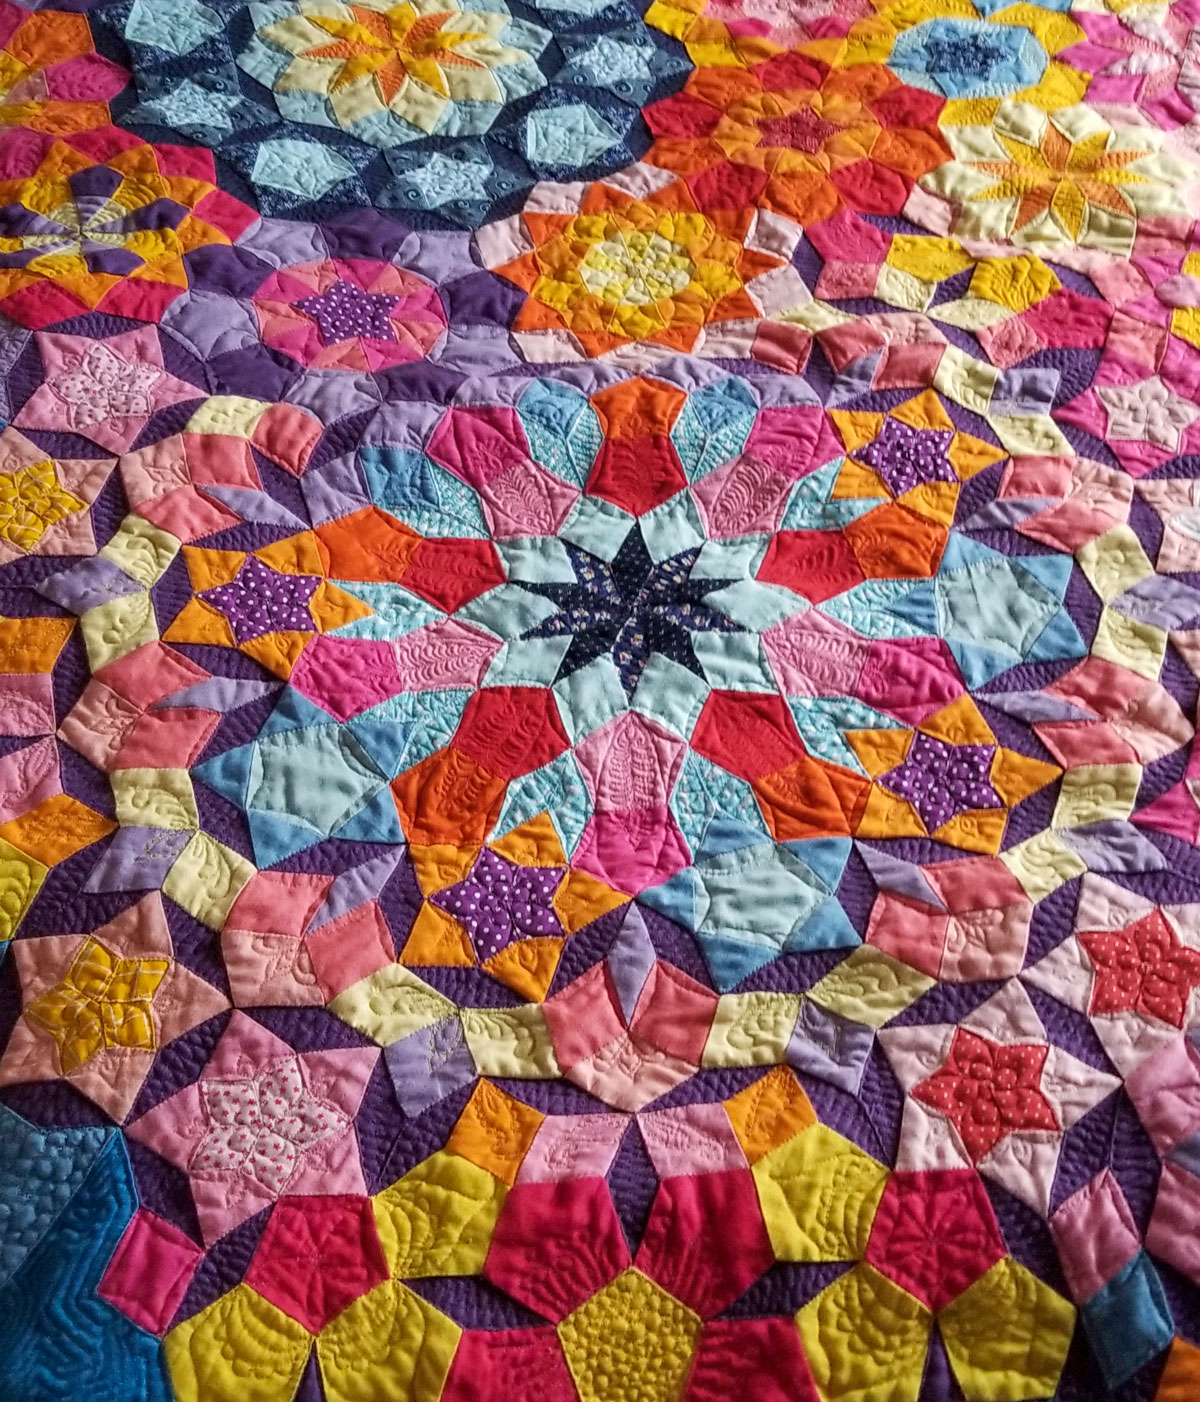
I do believe I stitched the binding strip before I started quilting, because that seals in the batting, which then doesn’t leave lint all over the work. I did make a mistake with the border: instead of measuring and pinning the border strips with rainbow in the middle, I just stitched them like a log cabin, and they ended up being longer than they should have been. Hence, when it came down to pinning the quilt sandwich, I had to deal with some serious bunching of the patchwork border that had to fit on top of properly sized backing. I could have redone it, but I decided not to. Most of the bunching you see in the photos below is due to quilt sitting folded for a couple of years, while the bunching of the border fabric was for the most part taken care of by quilting through it. Anyway, I’ve learned my lesson and I will be sure to measure and pin border strips on future quilts. I’ll skip a few more work in progress shots, and let you look at the finished quilt, as a whole and in detail.